Summary | Key concept | Science Story | Background Science | Activity | Curriculum links | Linked Activities
- Suggested Age Range: 9 – 10 years
- UK Primary Curriculum: Key Stage Two (upper)
- Suggested UK Year Group: Year 5
- UK Primary Curriculum Link: Earth and Space
- Science Subject: Constellations
- Science Question: What are constellations? How are stars arranged in space?
- Activity type: individual or pairs
- Suggested linked stories: Sharing The Sky; How the Pleiades were created; How Fisher went to Skyland; Starlight; How Coyote made the Stars; Following the Stars to Freedom – Part One; Following the Stars to Freedom – Part Two
Brief summary: Constellations are patterns of stars in the sky. While these patterns are extremely useful for learning your way around the sky, and for use in navigation on the Earth, these constellations are not physical groupings of stars. We see the patterns that we define as constellations because of the three-dimensional arrangement of stars in space.
Key concept: Constellations are groups of unrelated stars. The shapes we see are due to the location in space from which we view them. A constellation would look very different if we were looking at it from another planet.
Key words: stars, constellations, patterns
The Science Story:
Do you know what a pattern of stars is called?
A pattern of stars is called a constellation. Constellations are groups of stars on the sky. Some constellations look like animals or people.
Can you name any constellations that you know?
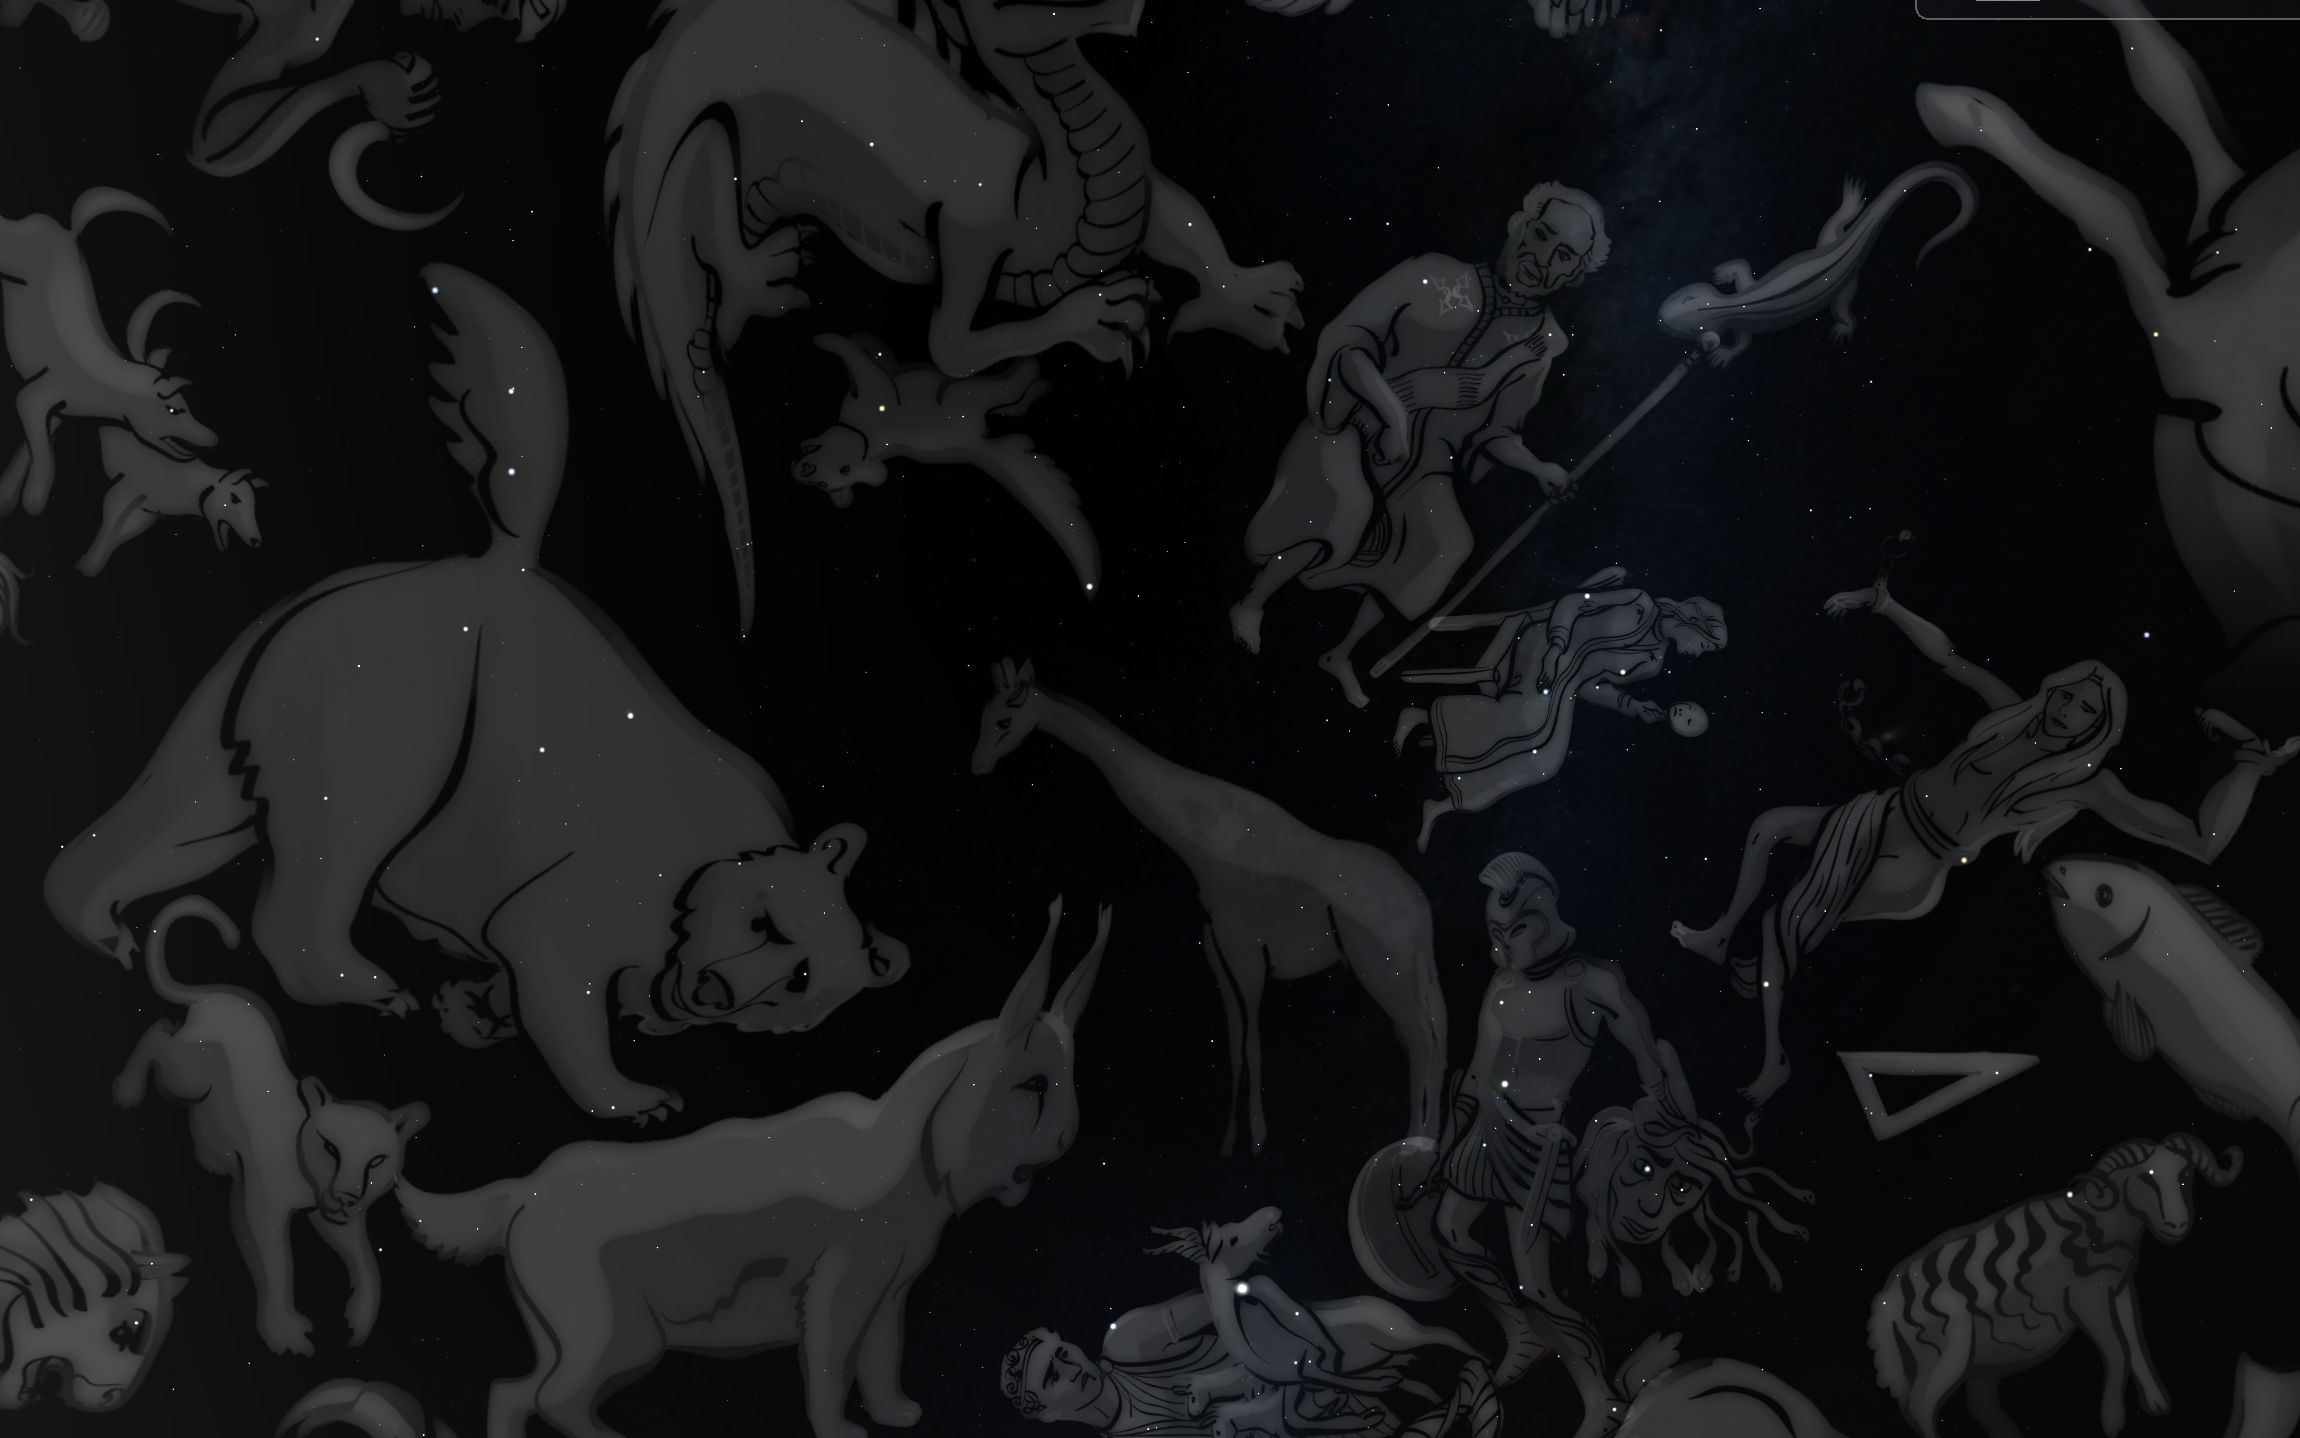
Famous constellations include Orion (the hunter), Leo (the lion), Scorpio (the scorpion), Cassiopeia (the queen of ancient Ethiopia), and Crux (the southern cross). Many of these constellations were invented by the people of ancient Greece, two thousand years ago, but other cultures see different shapes in the sky.
Why did the ancient people invent these constellations?
In ancient times it was very important to know the positions of the stars and how the stars changed with the seasons, because this meant that you could navigate, travelling safely to explore new places and able to find your way home again.
We find it easy to remember something when we hear it told as a story. Some cultures see the sky filled with animals. Other cultures see kings and queens or characters from stories.
Constellations look like patterns of stars on the sky, but stars are spread out like the trees in a forest: some stars are close to us, and others are much further away. Some stars are formed together at the same time, these are called clusters; other stars are formed at different times and much further apart, humans make patterns from these stars called constellations.
The constellations that we see in the sky are unique to the Earth. From anywhere else in the Universe, the patterns of stars would look different, and we would see different shapes and constellations in the sky.

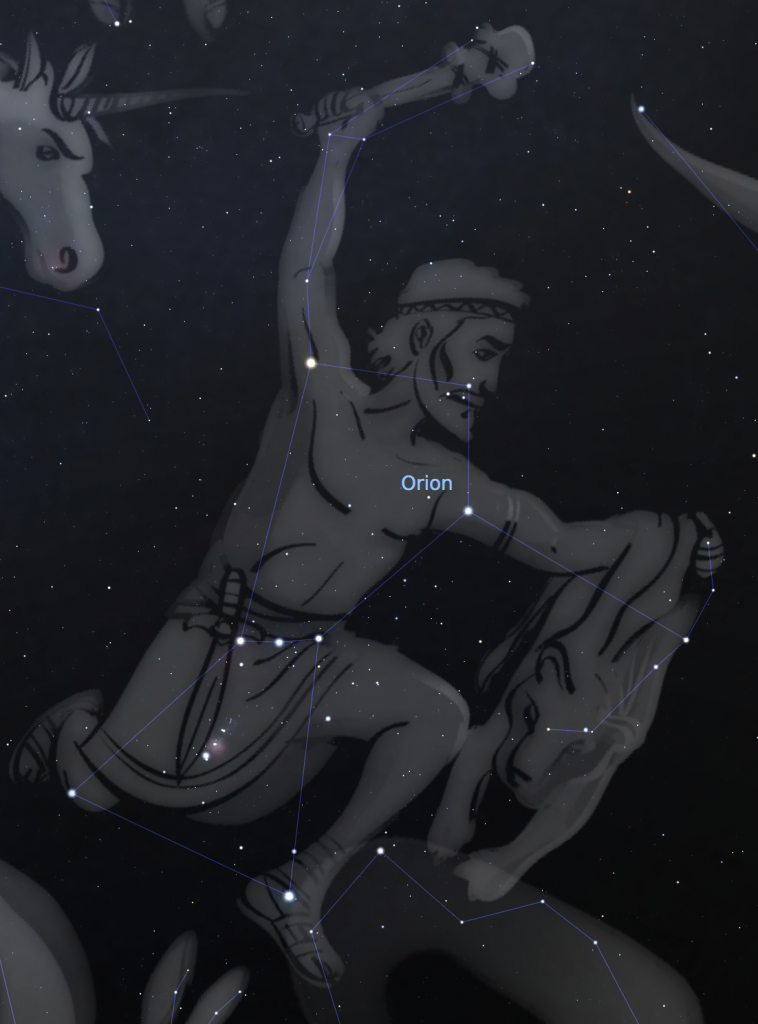
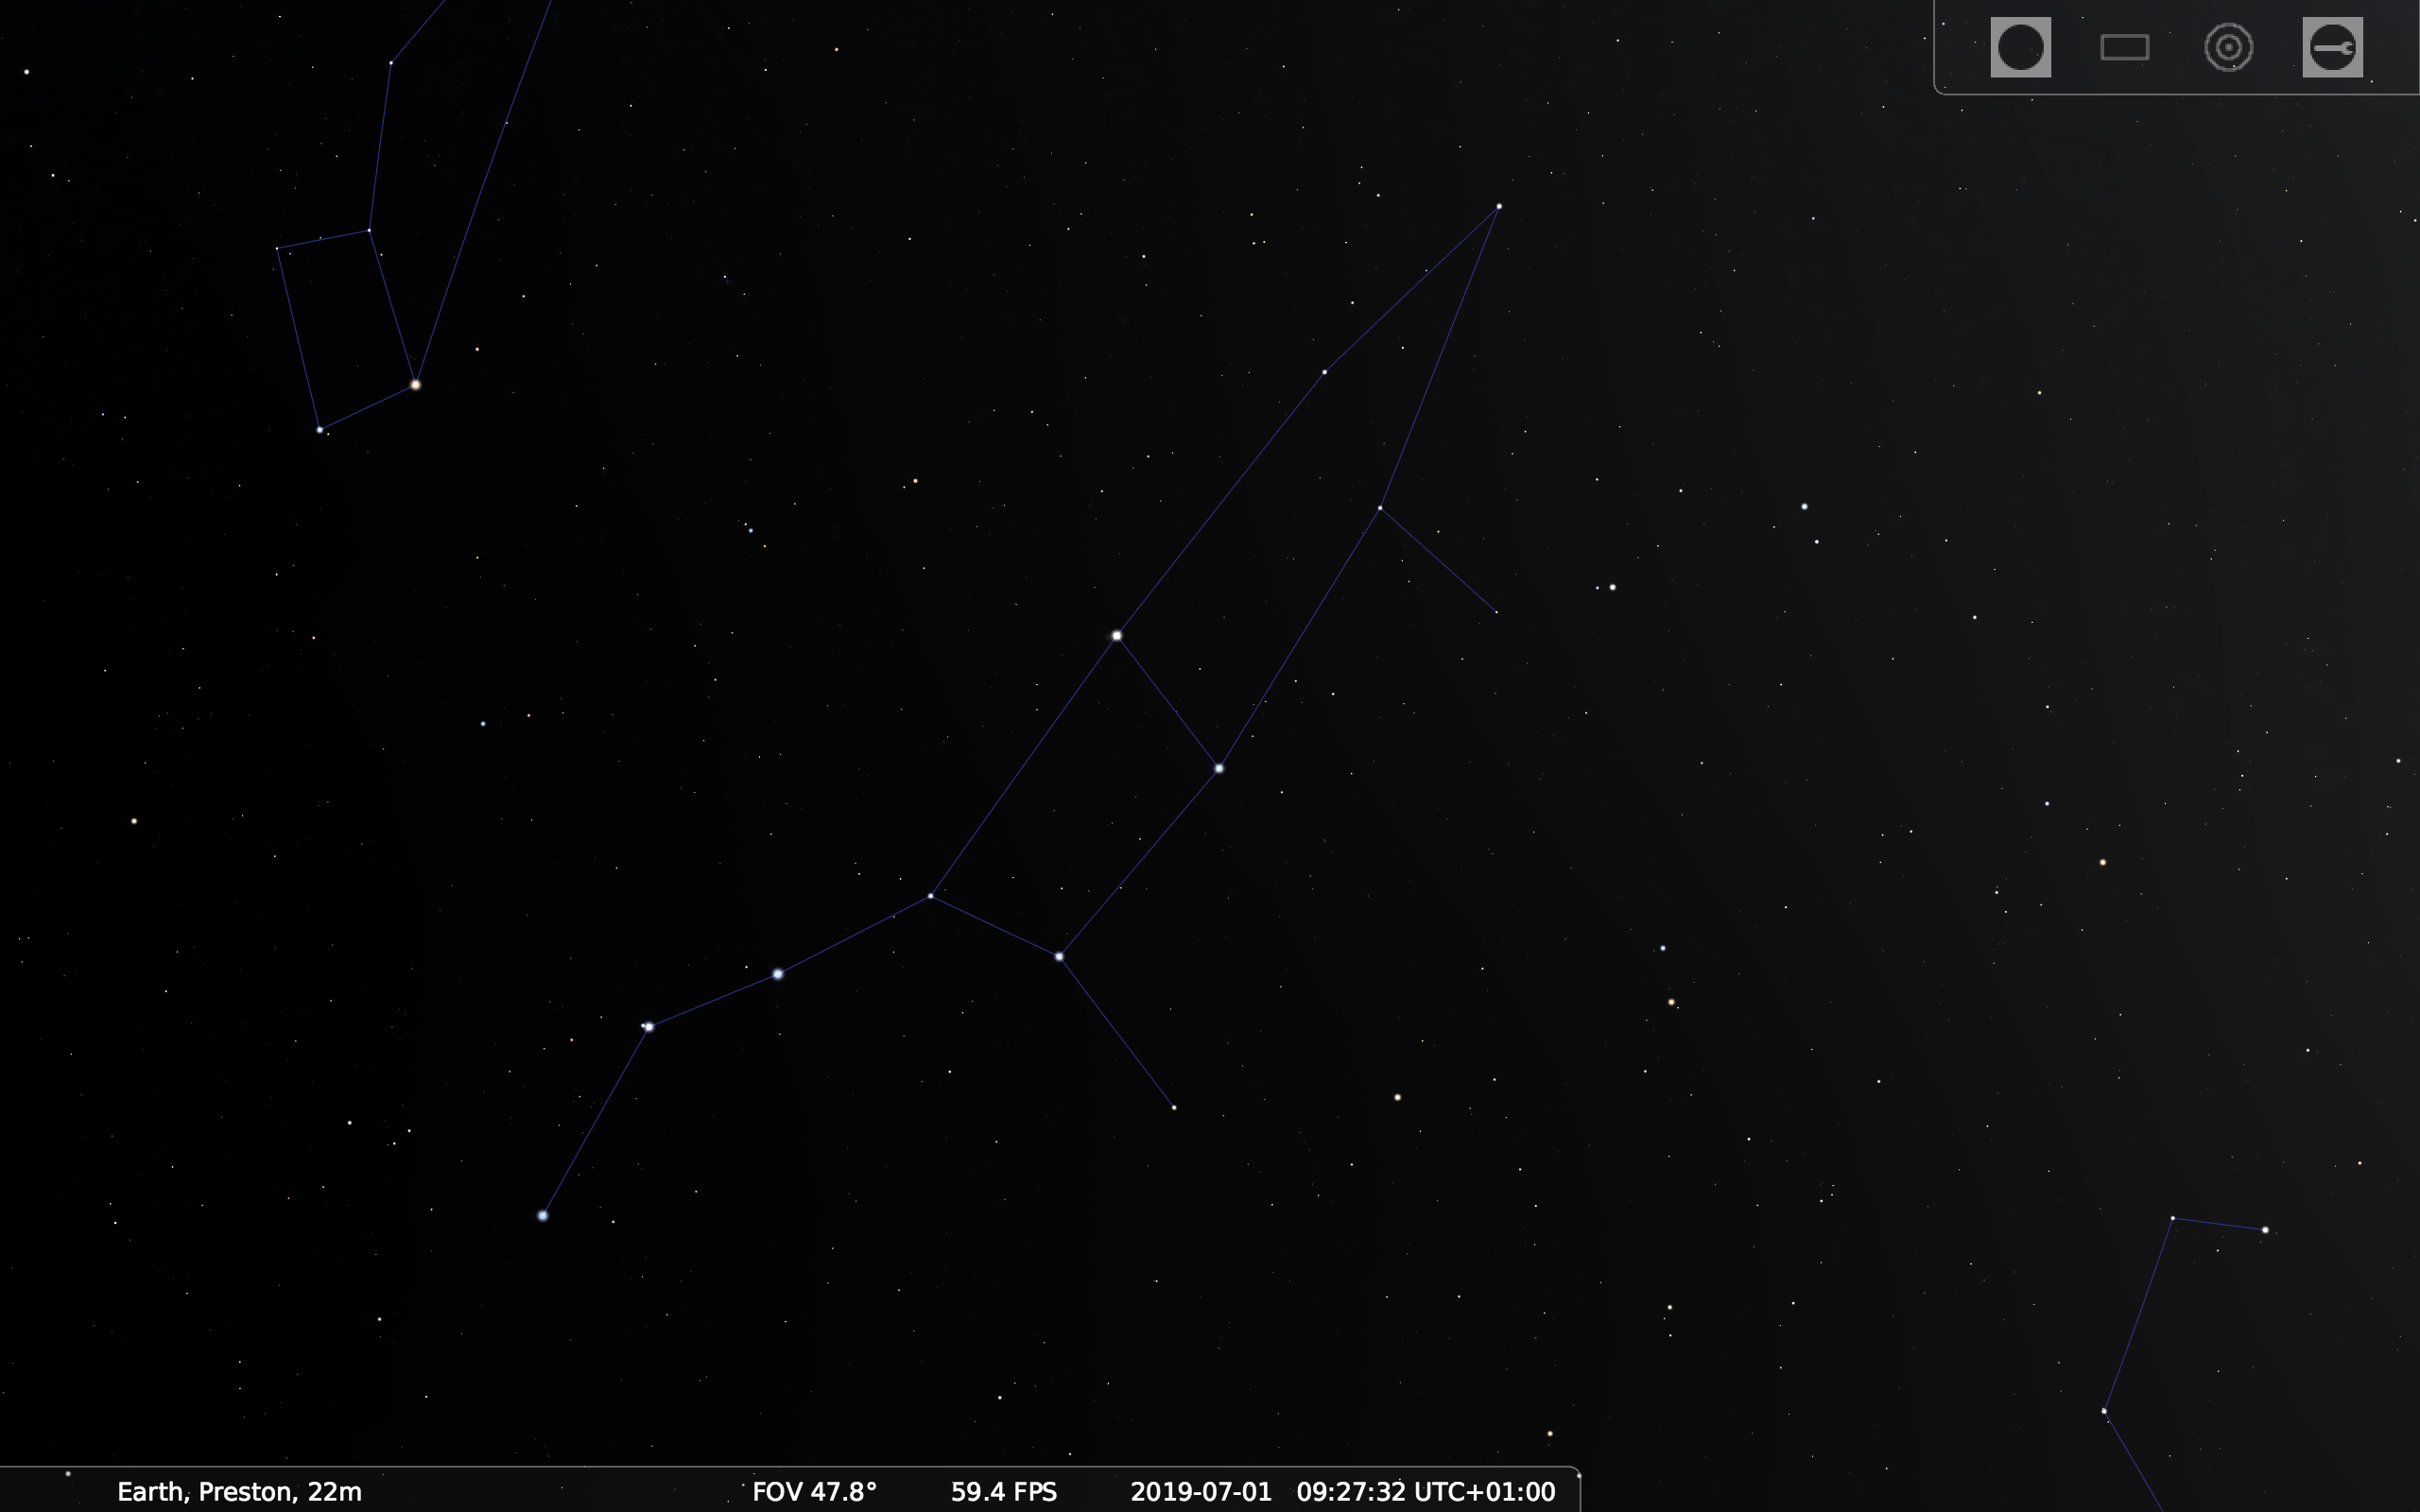
Orion – the hunter 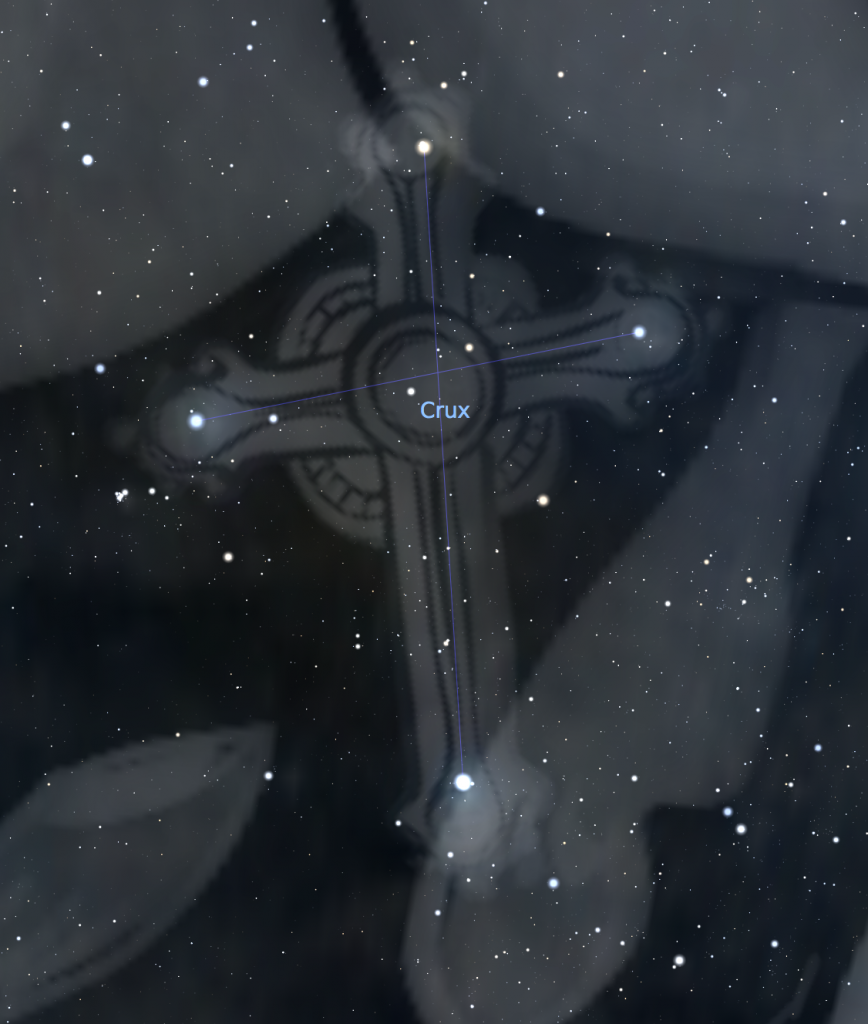
Crux – the Southern Cross 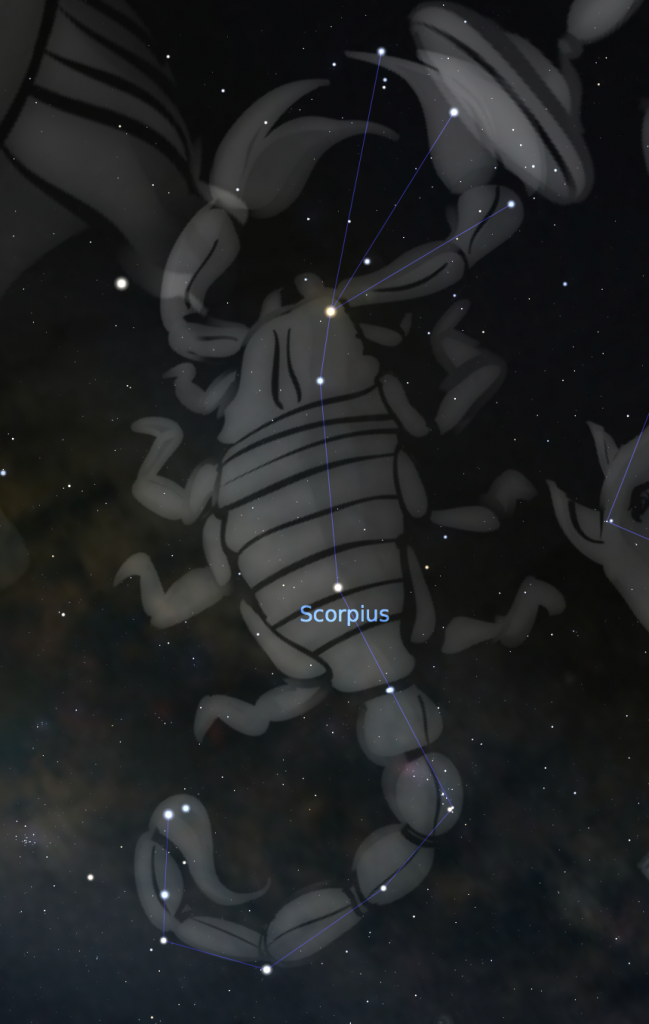
Scorpio – the scorpion 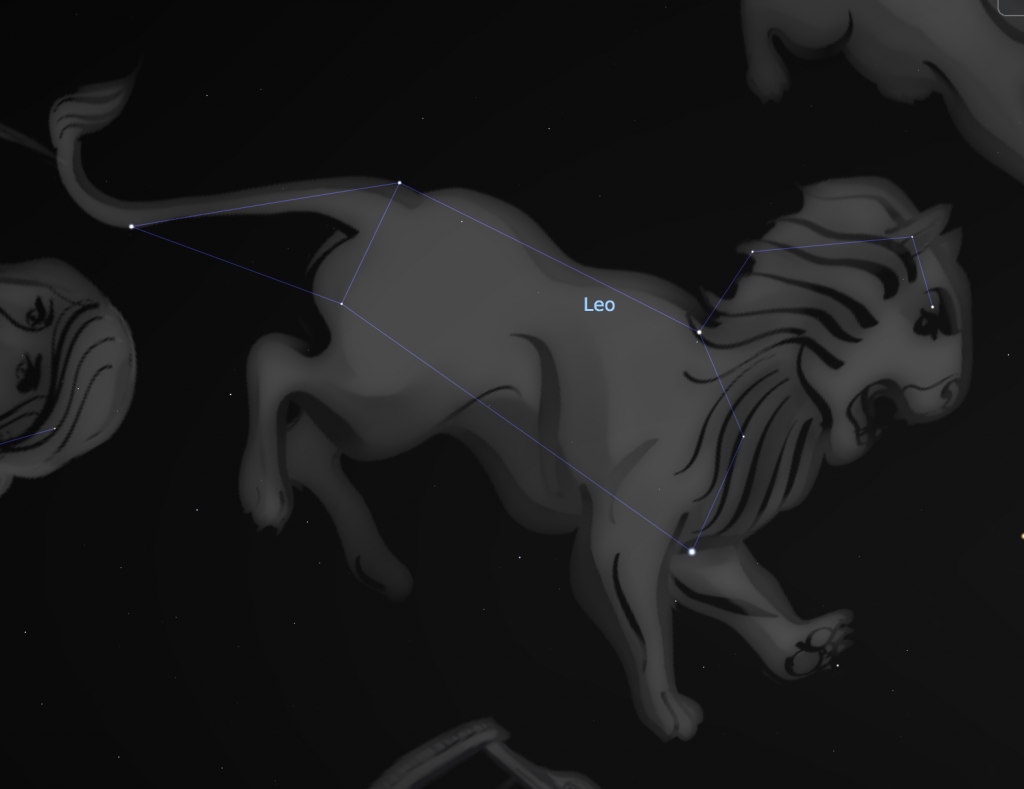
Leo – the lion 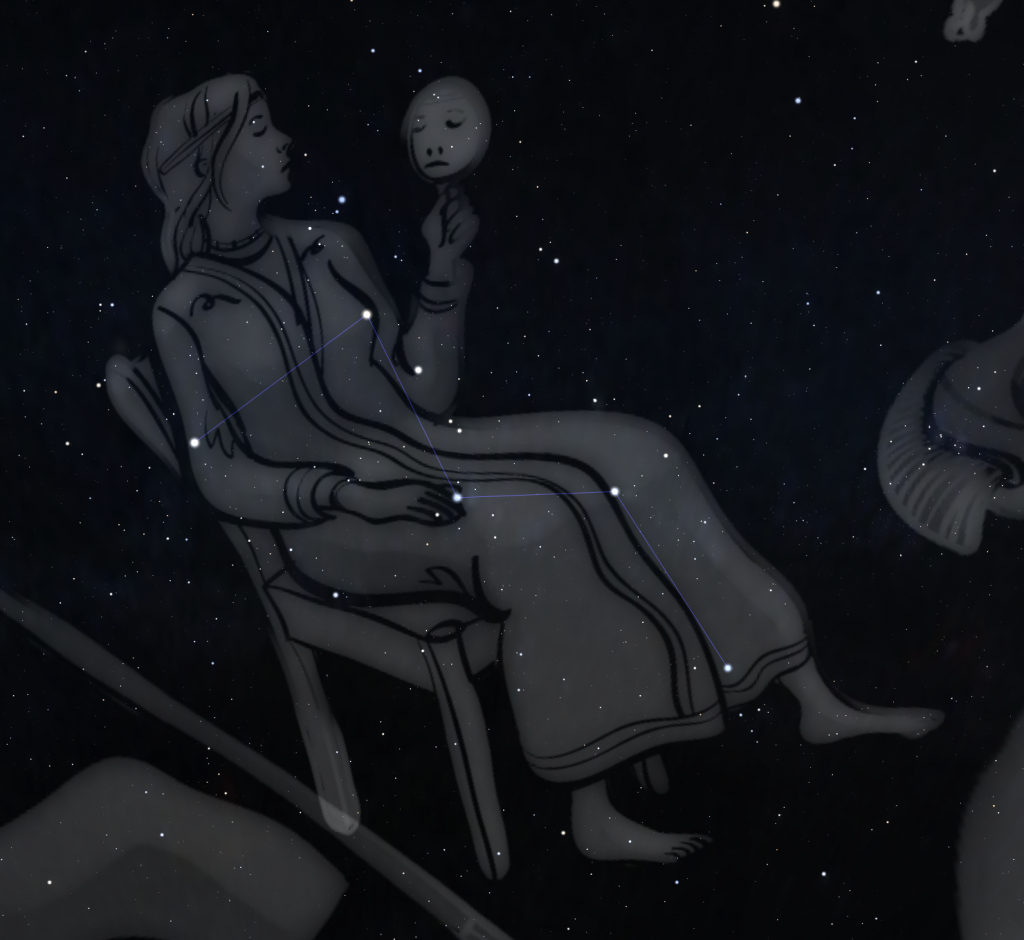
Cassiopeia – the queen of ancient Ethiopia
Above: images from the planetarium program Stellarium, showing the constellations referred to in the science story, above.
Created using Stellarium.

Created using Stellarium.
Created using Stellarium.
The Science: The stars that you see when you look up at the night sky are very like our own Sun – giant nuclear reactors that shine with incredible power. Our galaxy, known as the Milky Way, is made up of one hundred thousand million stars (roughly), including our own Sun, arranged in a disk shape. Our Sun sits inside the Milky Way, roughly two thirds of the distance from the centre to the edge of the disk.
Some stars are bigger and brighter than the Sun, others are smaller and fainter than the Sun. For stars of a particular brightness, the closer to the Earth a star is, the brighter it appears on the sky. A nearby star that is intrinsically faint can appear brighter to us than a more distant star that is inherently much brighter. This idea can be illustrated using distant streetlights and a nearby torch – even though the torch is actually fainter than the streetlight, it can be used to read a book up close even when not enough light is reaching you from the distant streetlight.
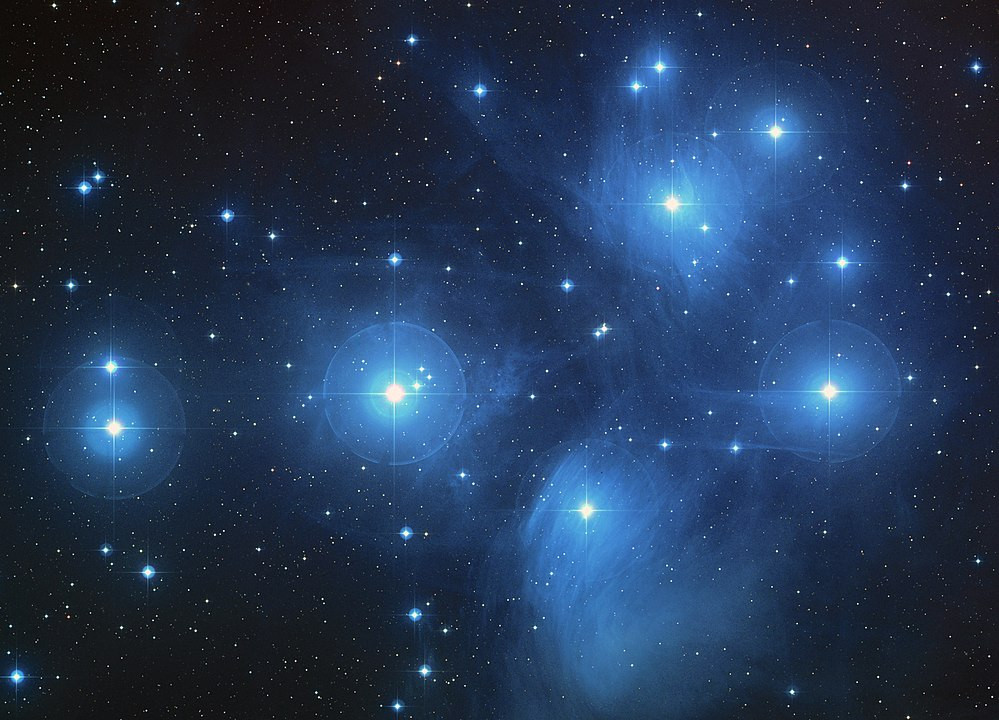
Some stars formed together at the same time, forming clusters. These are natural groups of stars that are physically close to each other in space. One of the most well-known clusters is known as the Seven Sisters (also known as the Pleiades Cluster). An image of the Seven Sisters can be seen on the left. This cluster is actually made up of several hundred stars which all formed together. Many cultures have their own stories about how this cluster of stars came to be in the sky.
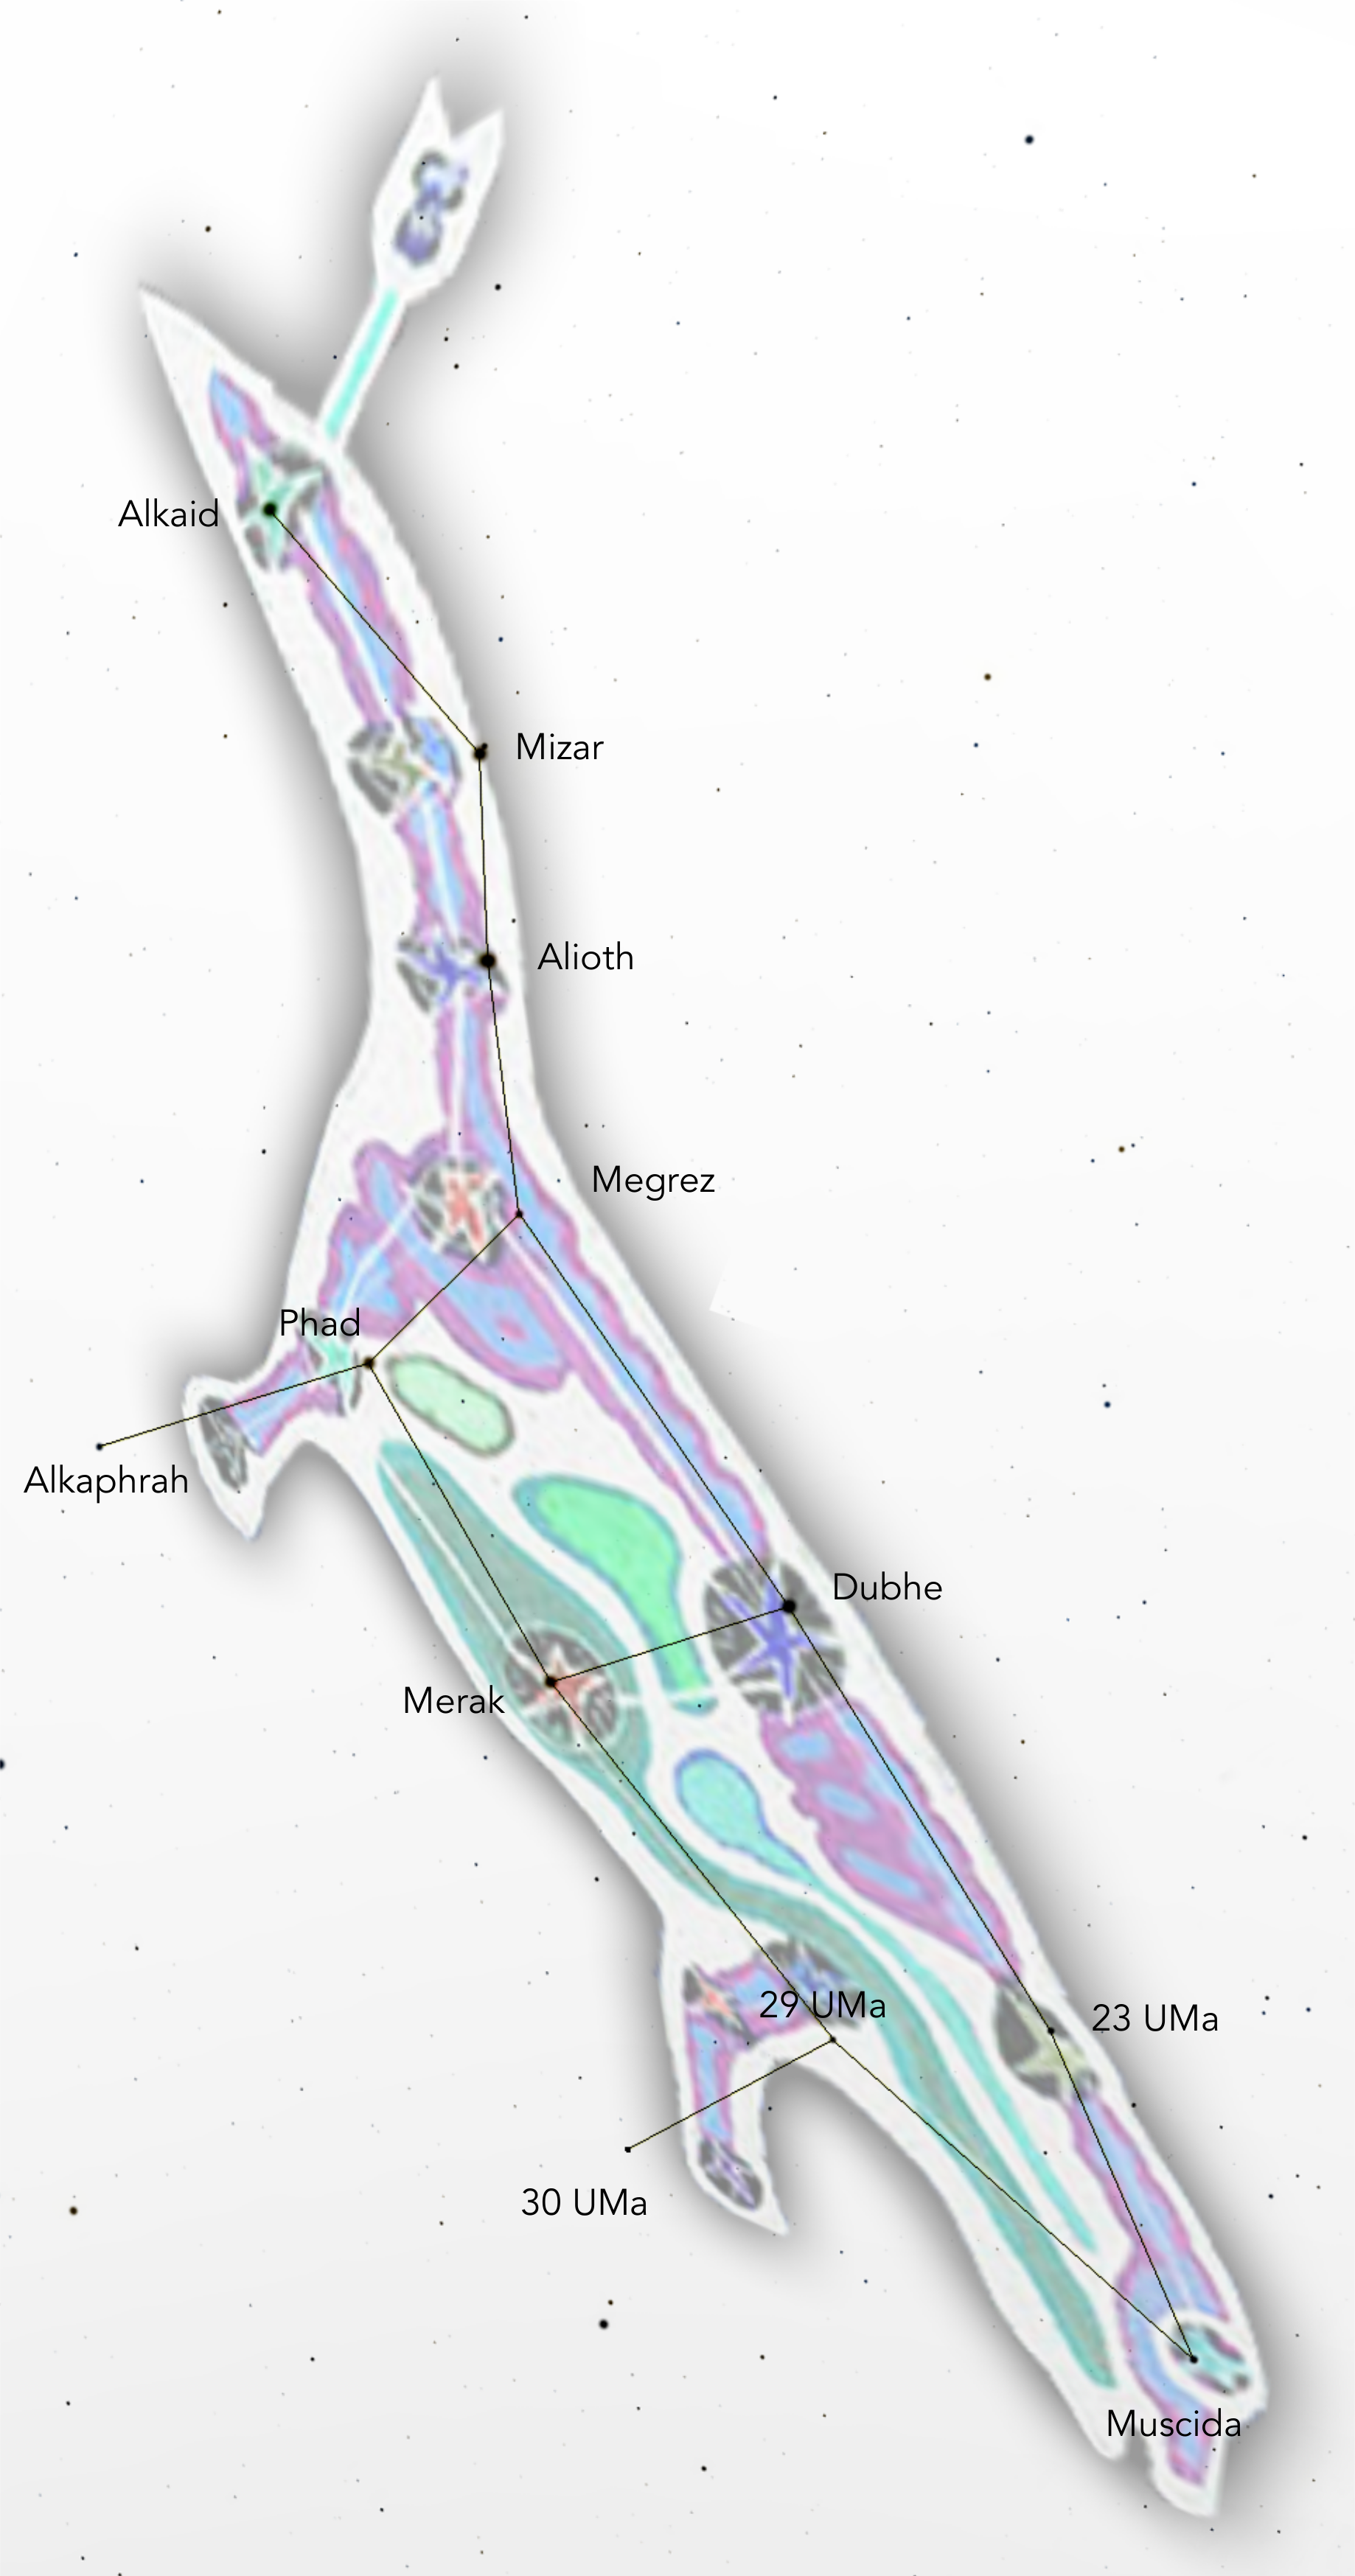
In contrast to clusters, constellations are made of stars that formed in different locations at various different times – these groupings are entirely artificial. The constellation we will use in this activity is the Fisher constellation, similar to the Great Bear on the sky, but comes from the sky lore of the First Nations of America.
While we are used to thinking of constellations as patterns of stars on the sky, in reality they are made up of (usually) widely separated stars that are physically unrelated to each other. This activity illustrates this concept using a simple table-top model that the students can construct and explore for themselves.
A useful analogy is with trees in a managed forest where they have been planted in rows. The rows look obvious from some angles, but not others.
The activity: In this activity, students use simple materials to construct their own model of the Fisher constellation, as defined by the First Nations of America. The same stars make up Ursa Major, the great bear, seen in modern star atlases. The model illustrates how a constellation only looks like Fisher when viewed from a particular viewpoint. The students can explore the model themselves and should be encouraged to see that the same arrangement of stars will look very different when observed from any other angle.
Props required:
- Printed copy of the Fisher constellation (see below)
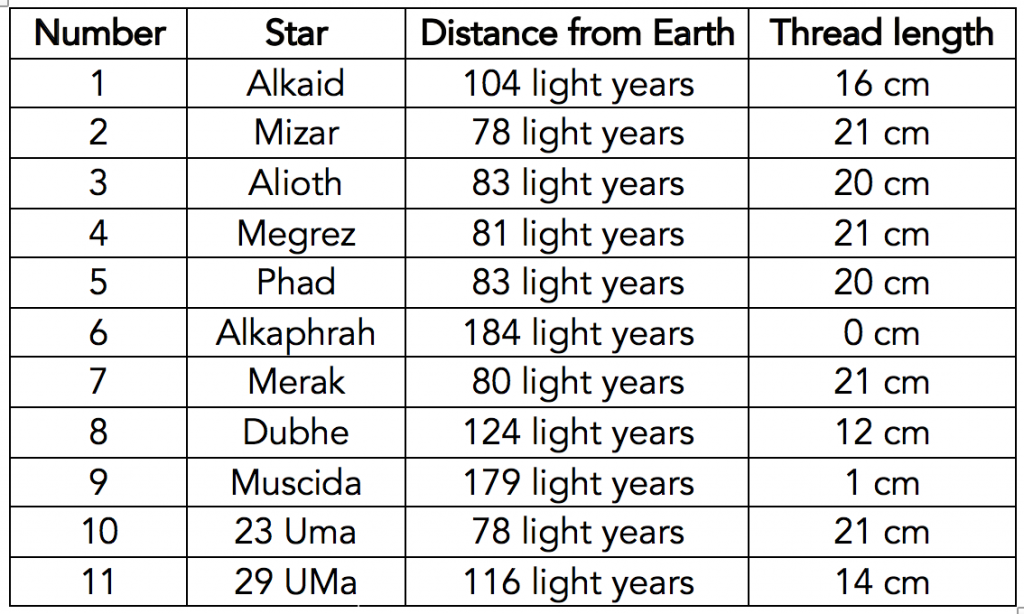
- Table of stars and their properties (see below)
- A4 piece of card
- Glue
- Tape
- String
- Foil
- Ruler
- Marker pen and pencil
- Scissors
Note: to make this activity quicker and easier for year 5 children, it helps to prepare a bag of items for each group in advance. Each bag should contain 11x35cm pieces of string and 11 (roughly square) pieces of foil.
- Use a pen or pencil to carefully make holes through the paper at the position of each star in the image of the Fisher constellation. Make sure your hole goes all the way through the paper.
- Carefully tear your foil into squares roughly 10cm by 10cm. You will need eleven pieces of foil.
- Use the scissors to cut eleven pieces of string, each piece should be 35cm in length.
- Tape a piece of string to the centre of a piece of foil.
- Crumple the foil into a ball around the end of the string. Make the ball as small as you can! This is your first star.
- Repeat steps 5 and 6 for the other stars. You should now have eleven stars. These stars will hang from your picture to make your constellation mobile.
- Find the star Alkaid in the table of stars. The table tells you how long the string needs to be for your mobile to look right. For Alkaid, the star needs to hang 16cm below the picture.
- Use your ruler to measure 16cm along the string from the star. Use your marker pen to mark the string at 16cm from the star.
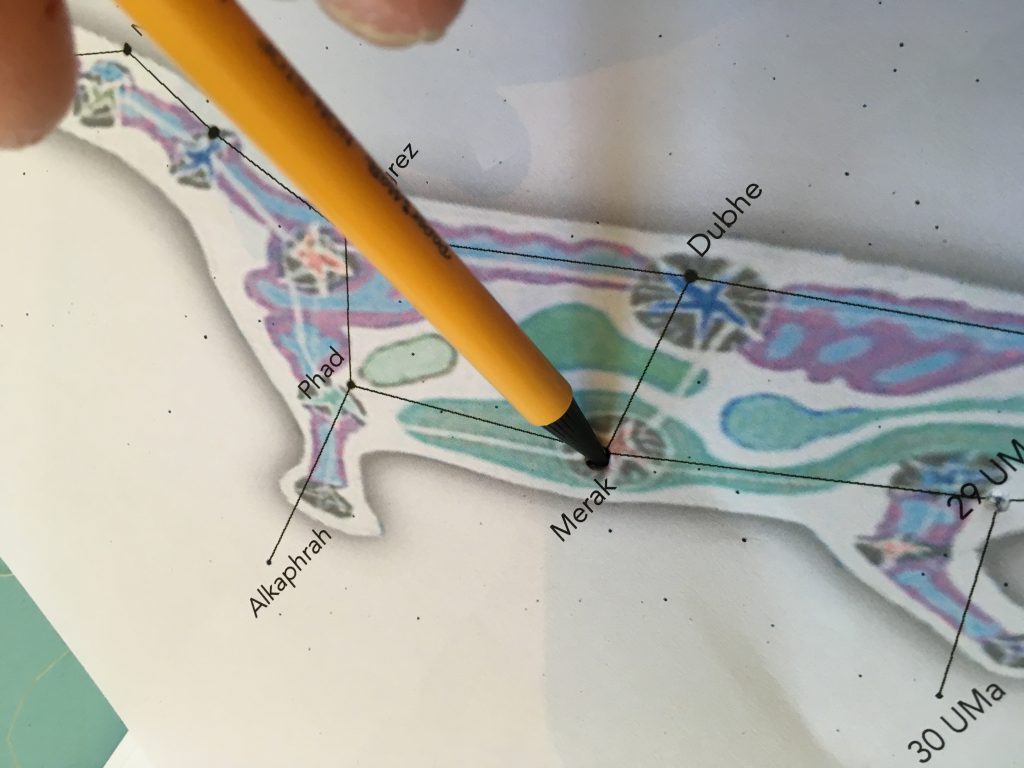
- Carefully push the free end of the string through the hole marked “Alkaid” in your picture of Fisher. Pull the string through until it reaches the mark you made.
- Tape the loose end of the string to the back of the picture.
- Repeat steps 8 to 10 for the other stars. Be careful with your strings – don’t let them get tangled!
- Note that for star 6, Alkaphrah, the length is 0cm. For this star, push the string through the picture as with the other stars, but pull it all the way through so that the star is touching the paper.
- When you have all of your stars taped in place, carefully glue or tape your picture of the Fisher constellation to your cardboard sheet. Make sure you can still see the constellation!
- Hold up your mobile over your head. Look carefully at your constellation – can you see the shape of Fisher?
- Look at your mobile from other positions and angles – do the stars look like the Fisher constellation if you look at them from the side? Are there any other ways of looking at the mobile that make the same constellation?
You may have noticed that there is a star missing! One of Fisher’s feet, 30 Uma, is not included in our model. This is because it is much further away from the Earth than the other stars. If we were to include 30 Uma in our model, we would have to make all of the threads longer by 51cm!
Extension: A larger version can be constructed using (for example) small lights and string hanging from the roof or other elevate structure. Students could design their own constellation “installation” for the classroom, using mathematics to determine the lengths of string needed and the locations of the positions of the strings.
The idea of constellations could be further explored through creative arts by encouraging the students to design their own constellations around real patterns of stars, coming up with their own stories for their constellations, and creating their own artistic representation of it.
Simplification: If you prefer to make a smaller constellation, or don’t have time for all eleven stars in one go, then the same effect can be seen using just stars numbered 1 to 5, 7 and 8 from the table to make the pattern known as the Plough or the Big Dipper. An alternative version of this activity from the American Museum of Natural History can be found here: https://www.amnh.org/explore/ology/astronomy/build-the-big-dipper2

Step 1: make holes using a pen or pencil 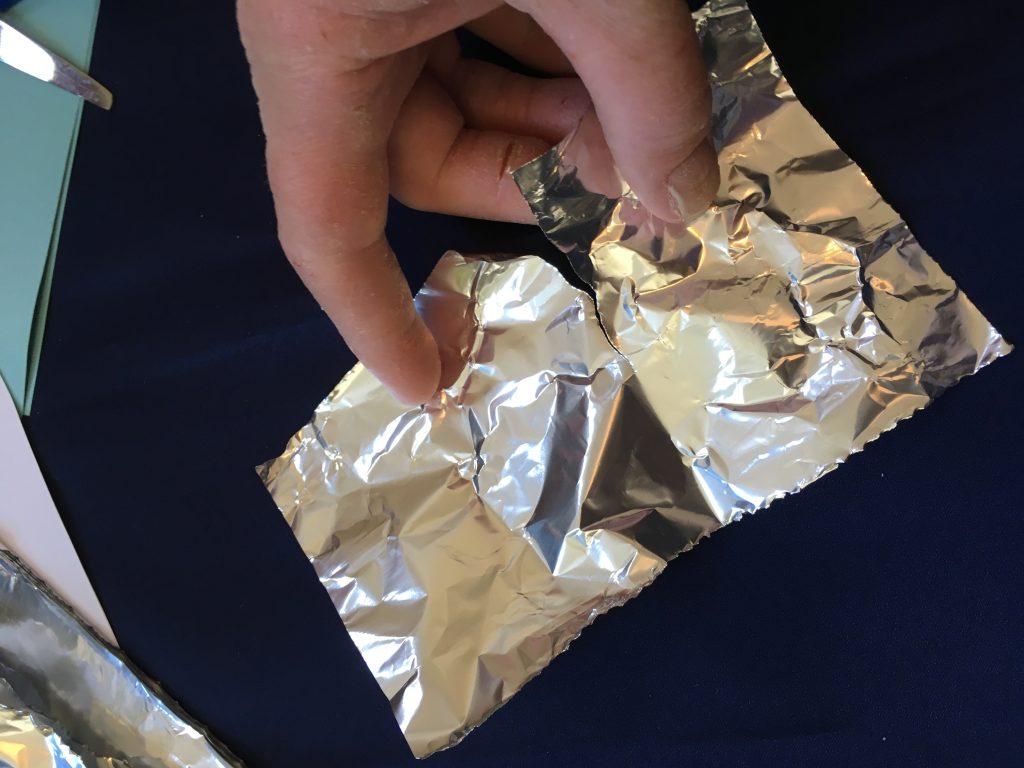
Step 2: tear your foil into pieces 
Step 3: measure and cut eleven pieces of thread 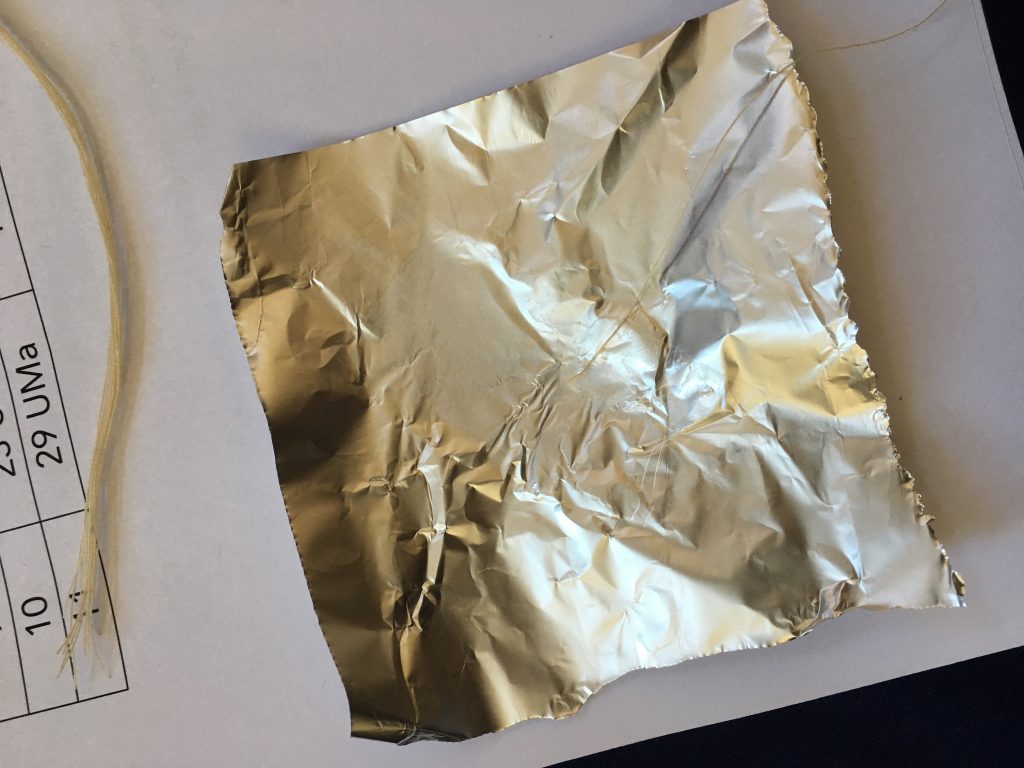
Step 4: tape the end of one thread to the centre of a foil square 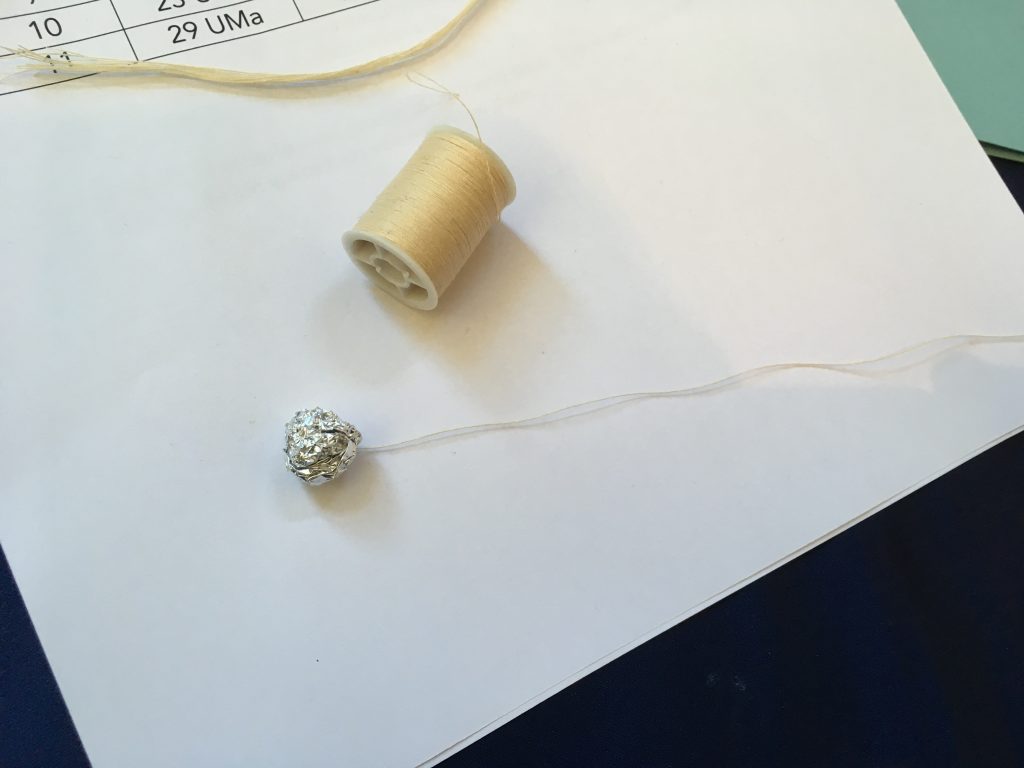
Step 5: squash the foil into a tight ball 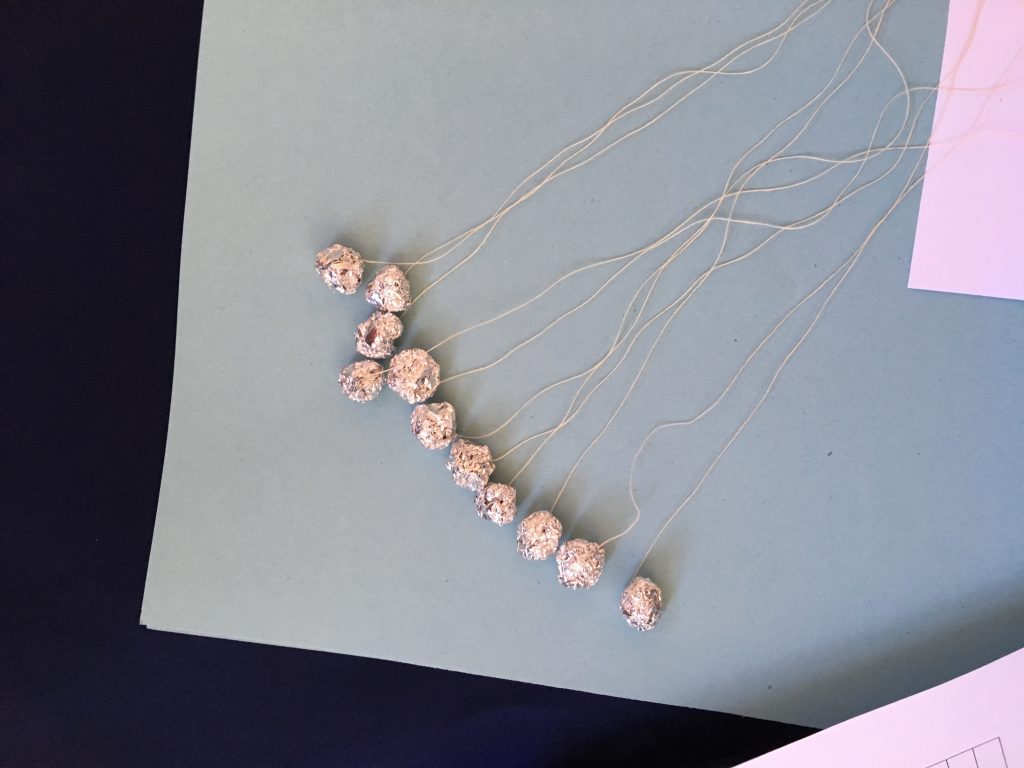
Step 6: eleven stars completed 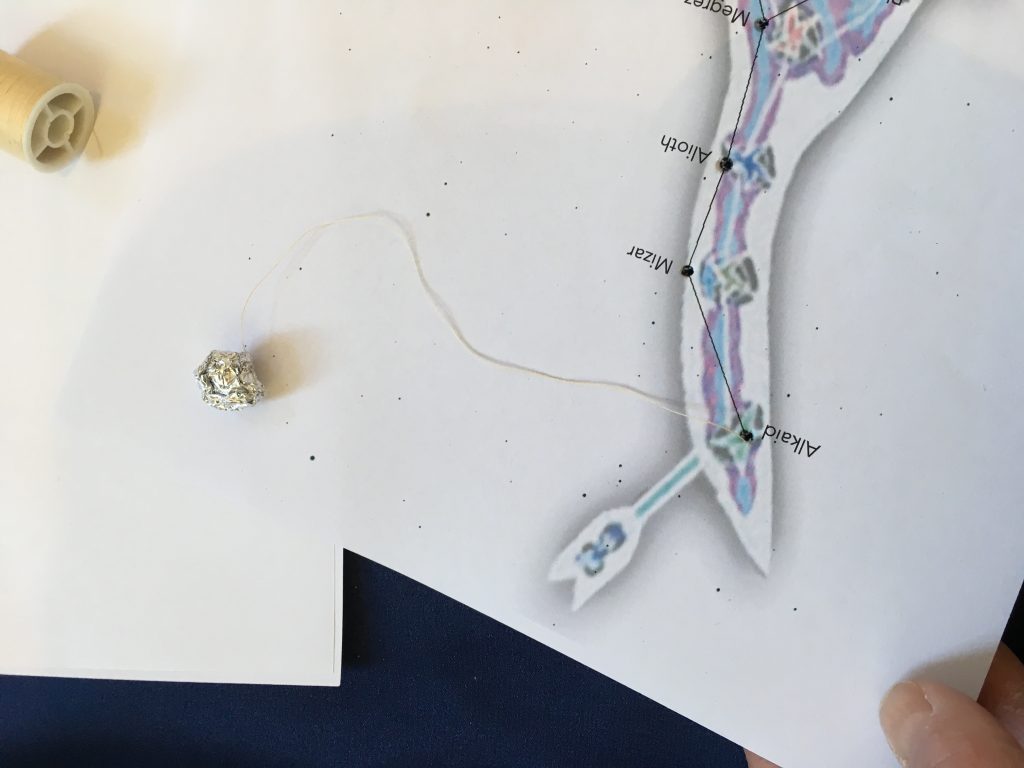
Step 7: push the free end of a thread through the hole marked “Alkaid” 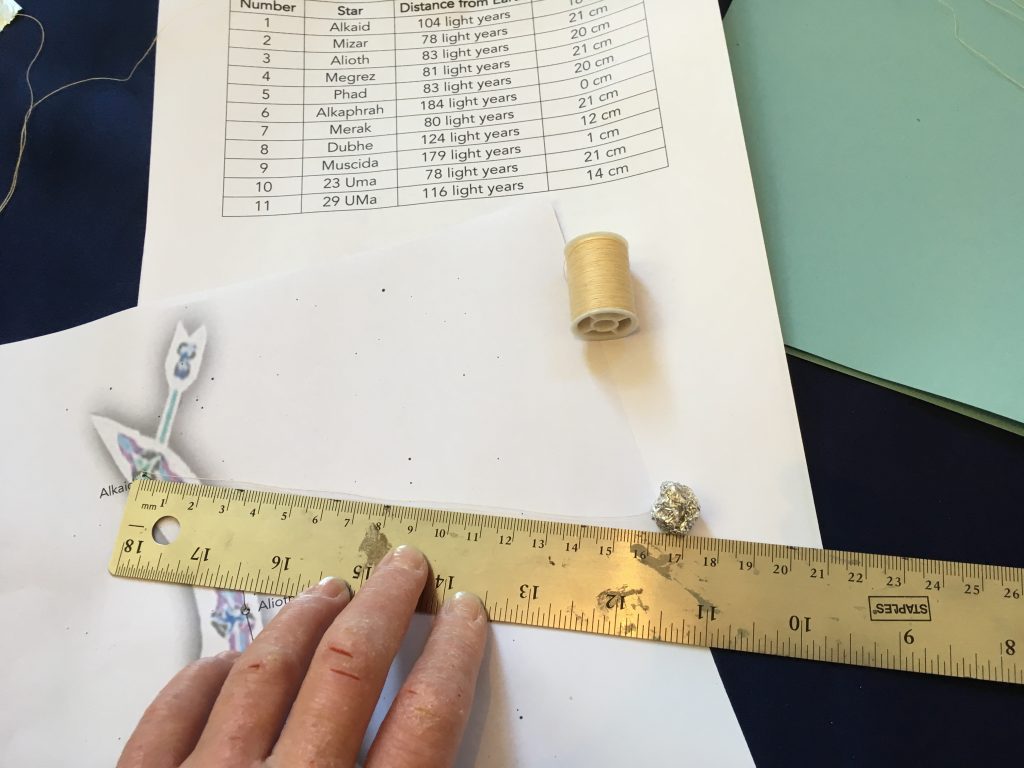
Step 8: measure the correct length for Alkaid 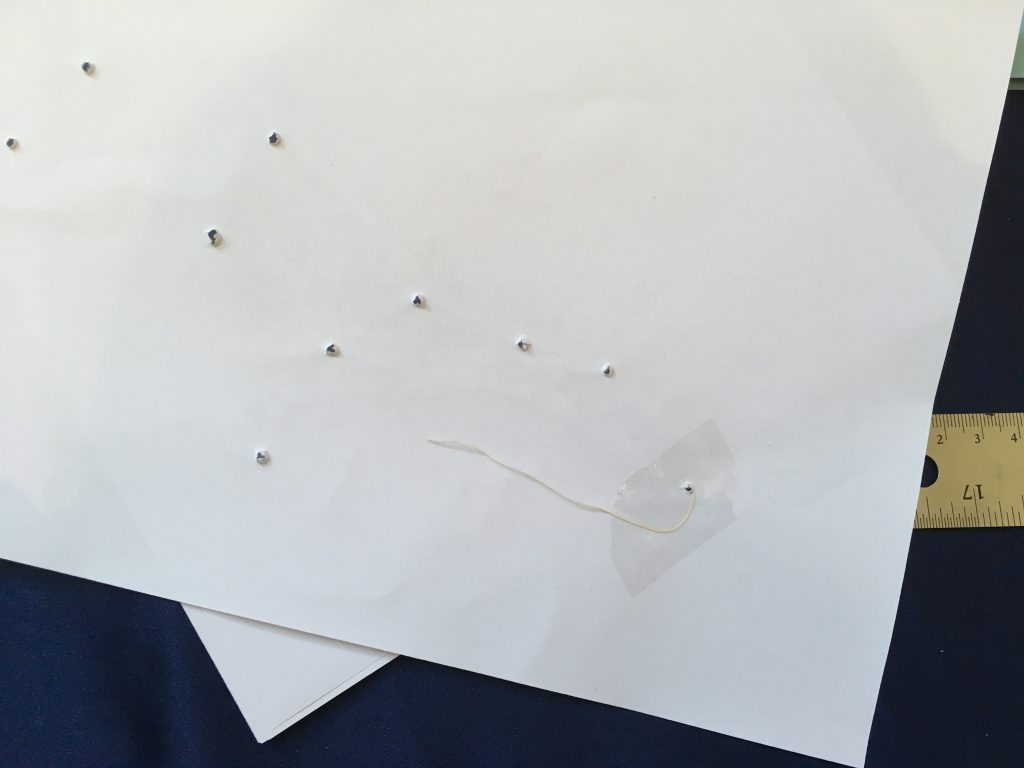
Step 9: tape the rest of the thread to the back of the image 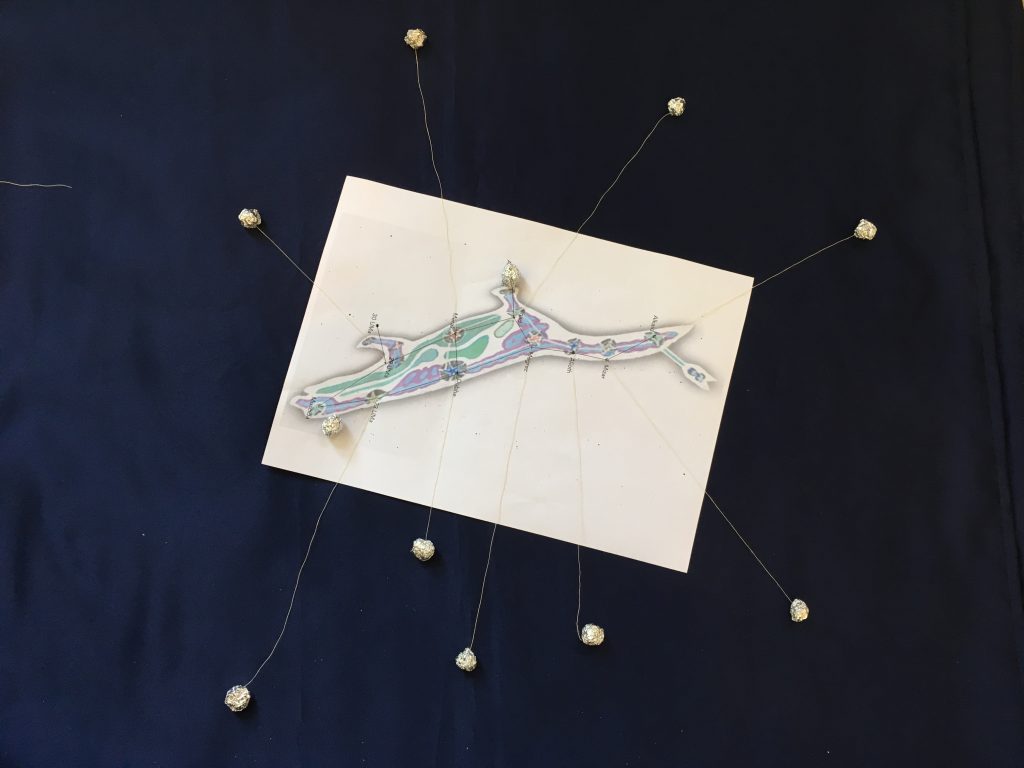
Steps 10 & 11: repeat for the rest of the stars 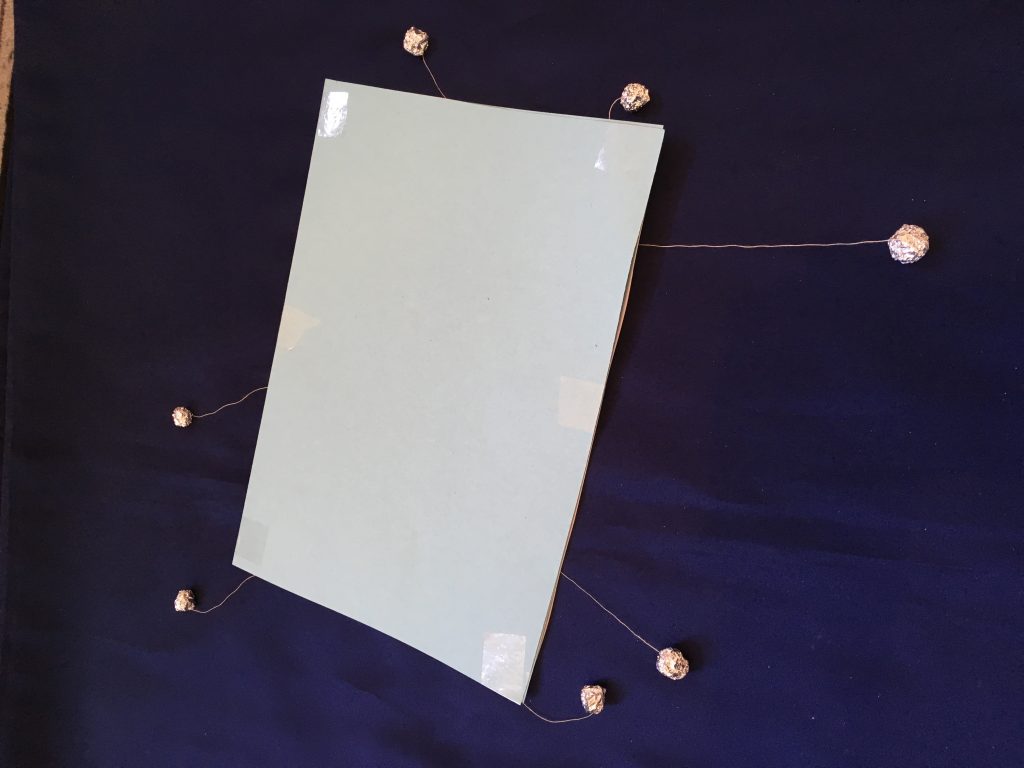
Step 12: glue or tape your card to the back of your picture 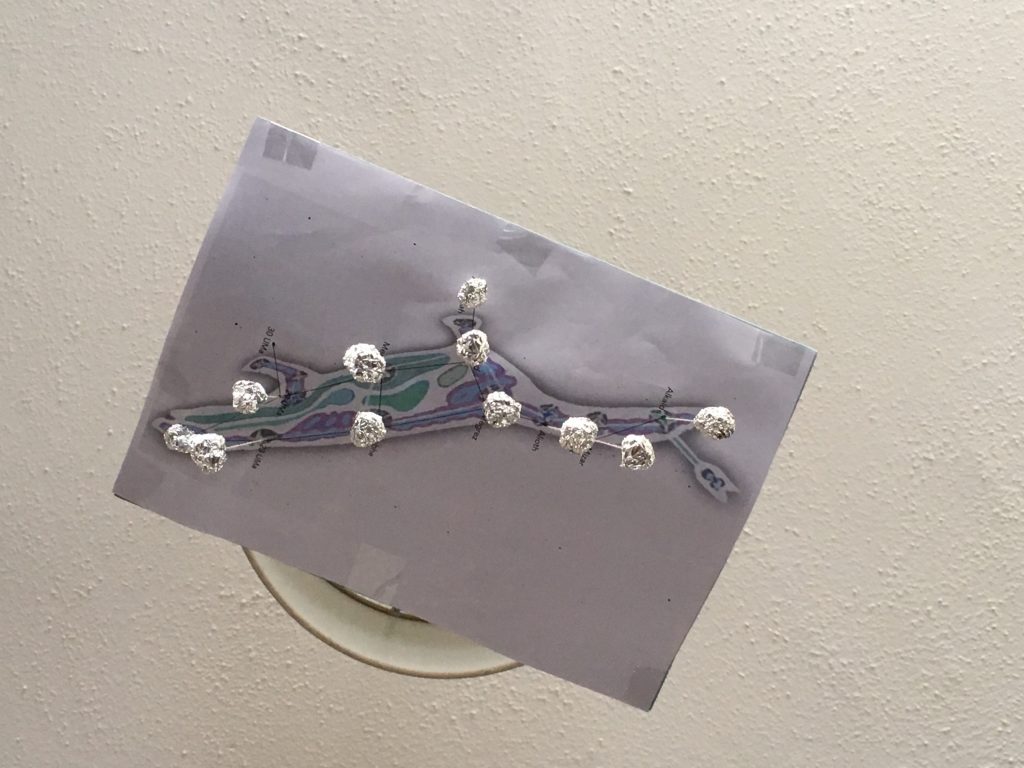
Step 13: hold the mobile over your head – can you see the shape of Fisher? 
Step 14: look at your constellation mobile from other angles – do you still see the shape of Fisher in your stars?
Common misconceptions:
- Constellations are often thought to be physical associations of stars, when in reality they are entirely artificial and the shapes we see are purely line-of-sight effects.
Curriculum links:
- Maths KS2 – number – counting and measuring, and using negative numbers
- Maths KS2 – geometry – position and direction – identify, describe and represent the position of a shape following a reflection or translation, using the appropriate language, and know that the shape has not changed
- Maths KS2 – geometry – properties of shapes – identifying and using angles (as lines of sight to view the mobile)
- Maths KS2 – measurement – using different measuring systems (comparison of light years to centimetres)
- Geography – America – understanding how the first Americans lived prior to the invasion of Columbus (navigation)
- History – America – Fisher (also known as the Big Dipper) was used by slaves to make their way to freedom e.g. http://www.northern-stars.com/Follow_theDrinking_Gourd.pdf
Linked activities:
Star Maps, making your own constellation picture and story using lentils – We Share the Same Moon: https://www.wesharethesamemoon.org/?p=2128
Star Crowns, make a hat to wear showing different types of stars – We Share the Same Moon: https://www.wesharethesamemoon.org/?p=1109
Make a star lantern, can be used to introduce the idea of constellations where this is less familiar – astroEDU
https://astroedu.iau.org/en/activities/1613/make-a-star-lantern/
Create a model of Orion, a longer, more involved version of this activity – astroEDU
https://astroedu.iau.org/en/activities/1607/what-is-a-constellation/
Similar activity from the American Museum of Natural History
https://www.amnh.org/explore/ology/astronomy/build-the-big-dipper2
Copyright: Megan Argo 2019