Summary | Key concept | Science Story | Background Science | Activity | Curriculum links | Linked Activities
- Suggested Age Range: 4 – 5 years; 7 – 8 years
- UK Primary Curriculum: EYFS (reception); Key Stage Two (lower)
- Suggested UK Year Group: EYFS (reception); Year 3
- UK EYFS Curriculum Link: Understanding the World
- UK Primary Curriculum Link: Rocks
- Science Subject: The Moon; Surface of the Moon
- Science Question: What makes the dark patches on the Moon? Why does the Moon have craters?
- Activity type: small group
- Suggested linked stories: A Rope to the Moon (EYFS); Travelling to the Moon (EYFS); The Woman in the Moon (Y3); The Man on the Moon (Y3)
Brief summary: The Moon has a rocky surface covered in craters. Many other planets in the solar system have similarly cratered surfaces, including the Earth. We don’t see so many craters on the Earth because of the combined effects of weathering and plate tectonics. The Moon has no atmosphere and no plate tectonics, so the cratering that happened in the early stages of the Solar System’s history is well-preserved today.
Key concept: The surface of the Moon is covered in craters from the impact of rocks; the size and angle of the impactor affects the size and shape of the resulting crater.
Key words: rock, crater, impact, force
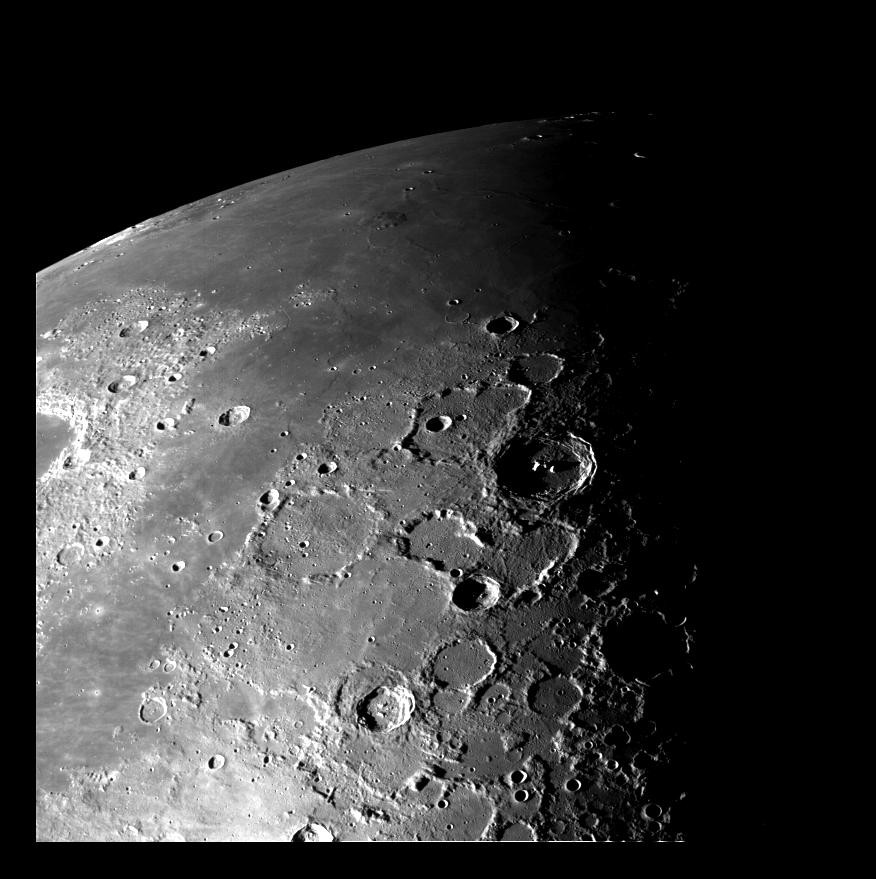
Visuals: See below for images of the Moon. See also images of various lunar features from the Lunar Planetary Institute.
The Science Story:
What do you see when you look at the Moon? (Show picture of the Moon, see below.)
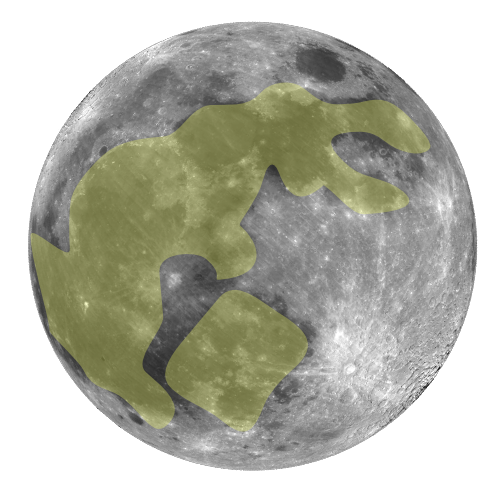
Some people see a Man in the Moon, other people see an African woman, a rabbit, a dragon, a lion, even a crocodile.
Can you see any of these in the Moon? (Discussion about what shapes or characters the students can see in the face of the Moon.)
The features we see on the Moon are called craters. A crater is made when a rock from space hits the Moon. The surface of the Moon is made of rock, like the Earth, but it is much colder on the Moon, there is no air, and there are no oceans, seas or lakes.
Rocks are called asteroids when they are in space, and when they land on a planet or a moon they cause a lot of damage and can make dents in the surface. These dents are called craters.
Do big rocks or small rocks cause the most damage?
Big rocks cause more damage than small rocks, they make bigger craters. But it isn’t just the size of the asteroid that changes the size of the crater.
What else might affect the size or shape of the crater?
Many things have an effect on the crater, not just the size of the asteroid. The speed of the asteroid is also important, and the type of rock is also important. Some rocks are hard, like granite, other rocks are soft, like chalk. Harder asteroids that travel fast make the largest craters.
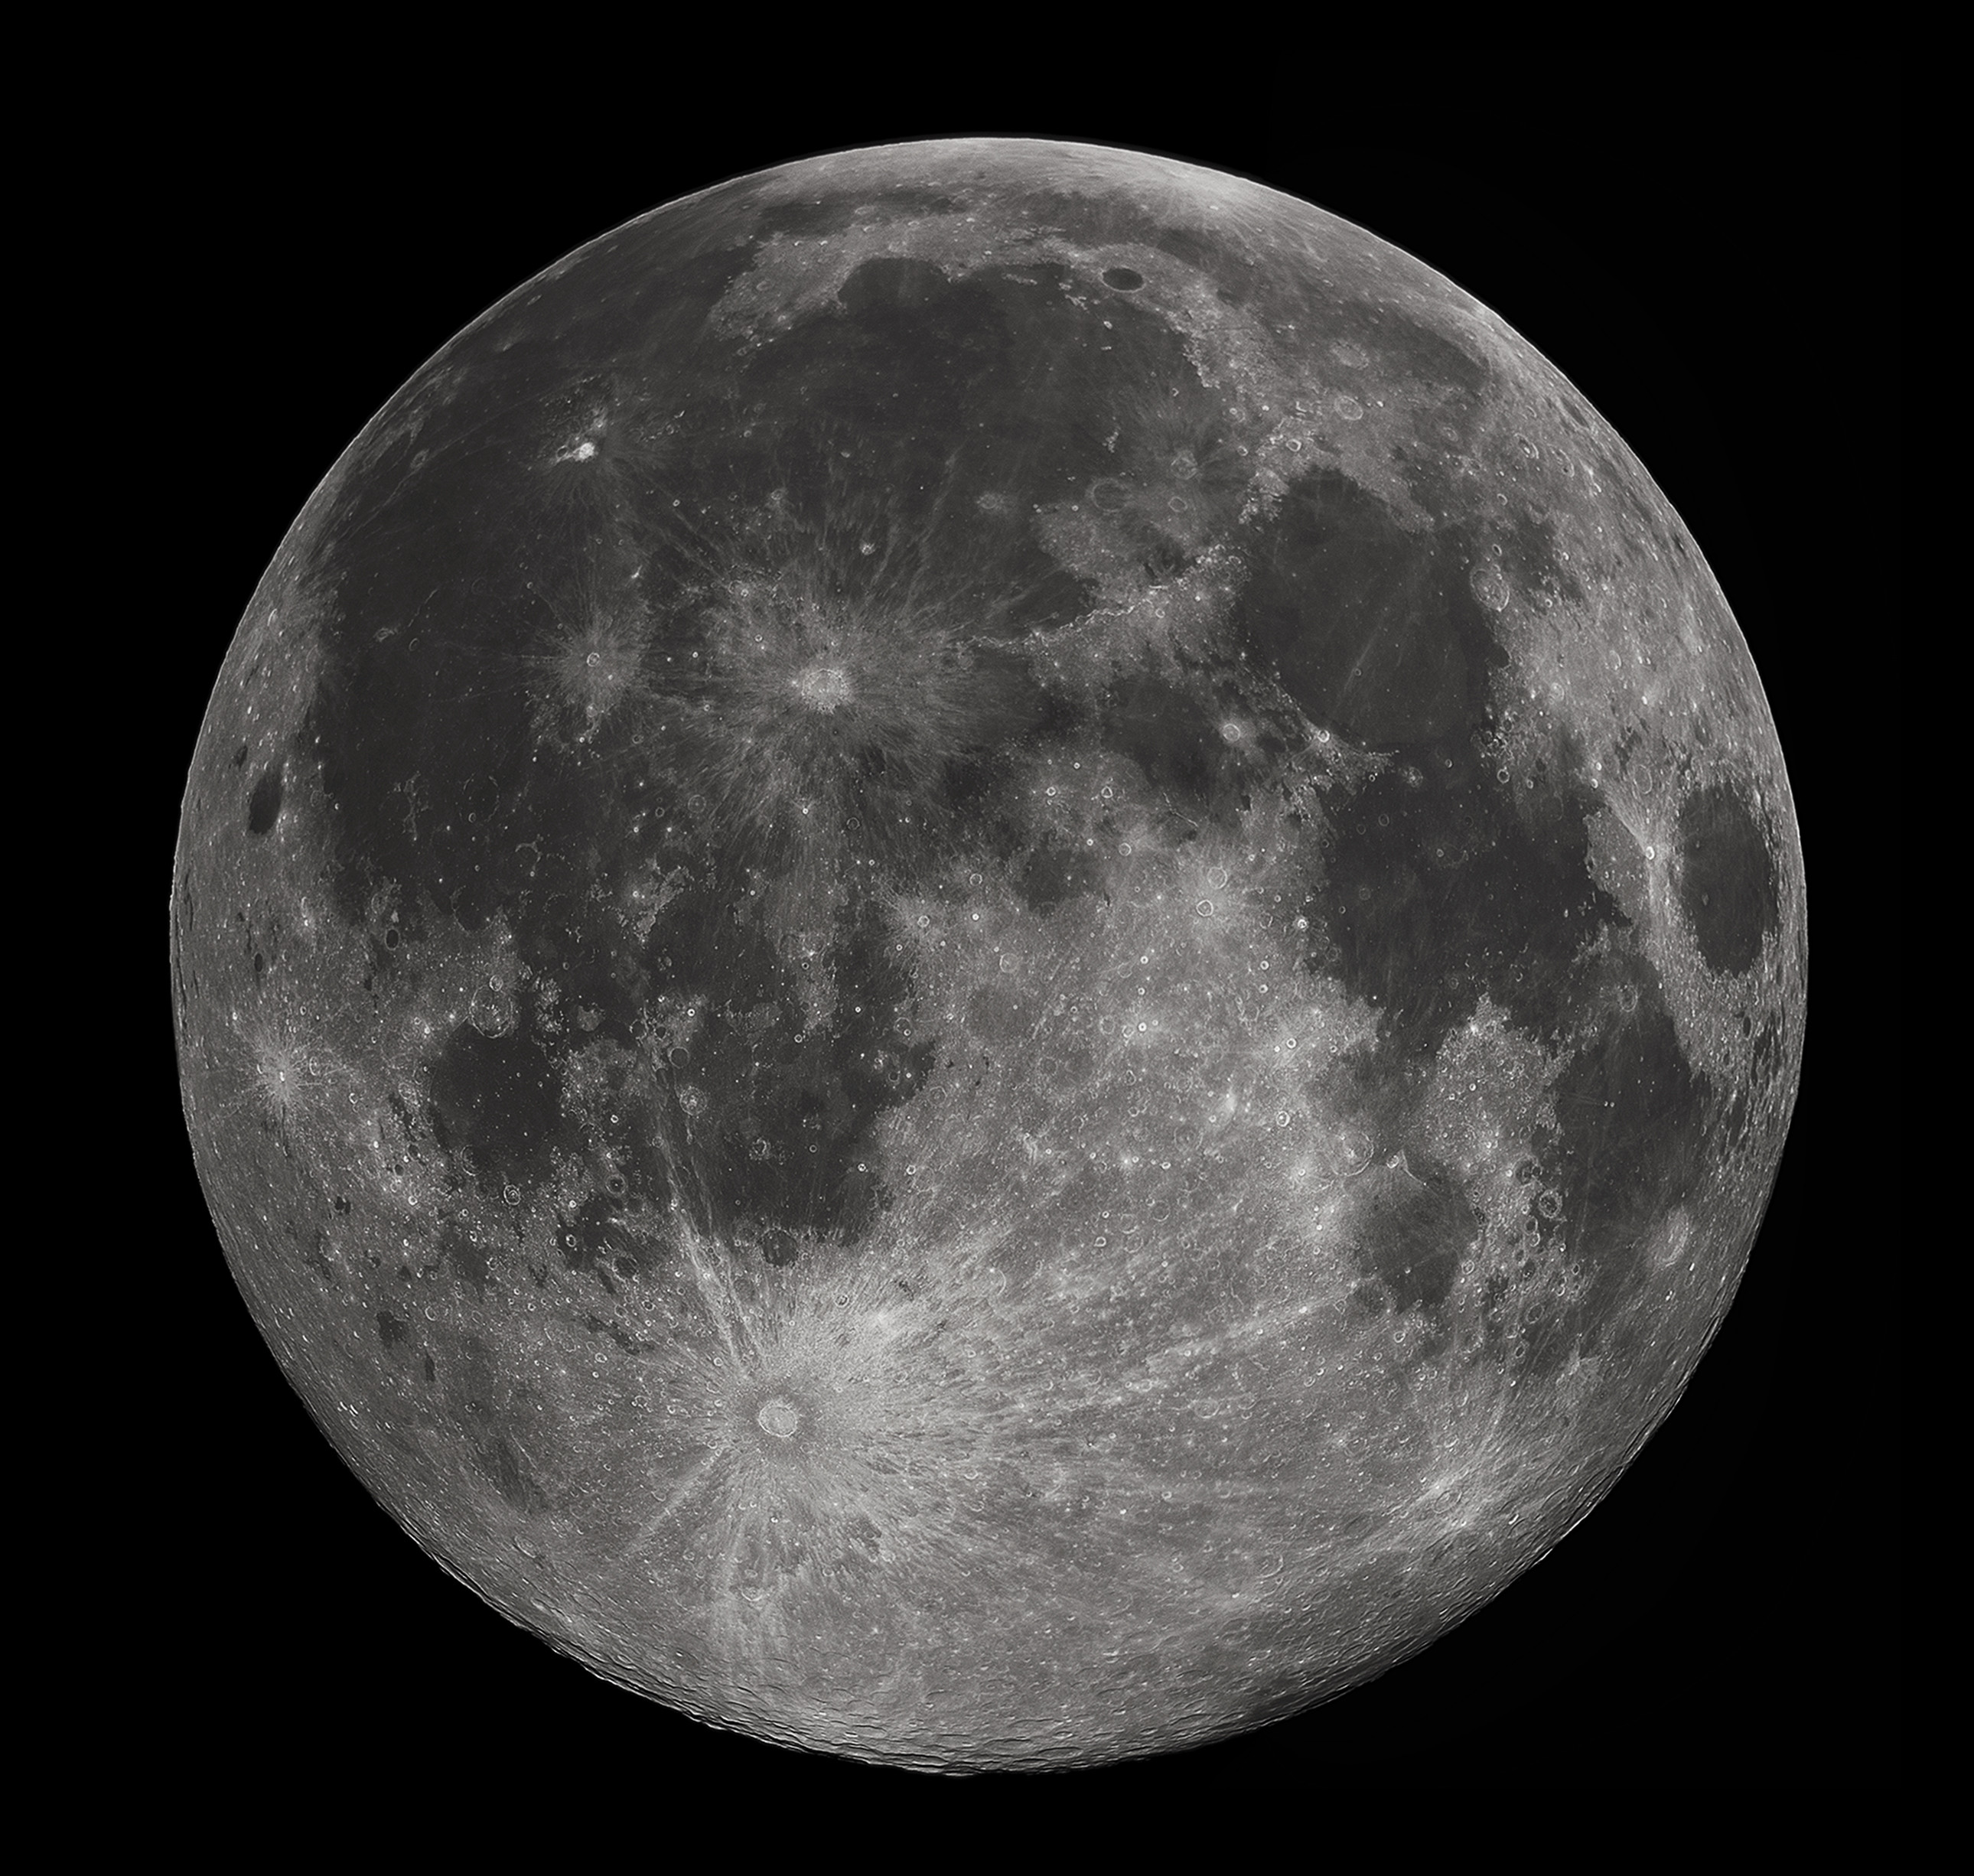
By Zeimusu, CC BY-SA 3.0, https://commons.wikimedia.org/w/index.php?curid=427426
December 7 and 8, 1992. It shows many craters that have been formed over the history of the Moon as rocks have crashed into the surface.
The Science: The Moon, like the Earth and the rest of the rocky planets, was formed in the early Solar System roughly 4.5 billion years ago. In the early Solar System the young Sun was surrounded by a disk of rocky and dusty material. Small rocks bumped into each other, sometimes they bounced off each other, sometimes they stuck together. When rocks stuck together, they became larger. As more and more rocks stuck together, small bodies (known as planetesimals) were formed. As these planetesimals continued to grow, their gravitational pull increased, and the heavier they got the more material they pulled in from the surrounding cloud. These planetesimals eventually become large enough that they became spherical. This process carried on until there were only a few large spherical bodies, plus the remains of the rocky debris. Over the next few million years, the debris continued to move around the young Solar System, and large amounts of it impacted on the surface of the young planets. These impacts left scars on the rocky surfaces of the terrestrial planets.
Craters are visible on the surface of every rocky body in the Solar System, including Mercury, Venus, the Earth and Moon, Mars, as well as Pluto and its moons, and the rocky moons of Jupiter and Saturn. Asteroids do also impact the surface of the gas giant planets as well, but they do not create craters since there is no solid surface on which to impact. A comet (Schumacher Levi 9) impacted the surface of Jupiter back in the 1990s and left what looked like bruises in the top layer of Jupiter’s thick gaseous atmosphere. After a few months, the bruises disappeared, leaving no trace that there had been an impact at all.
The size and shape of the craters seen on the rocky planets and moons depends on the nature of the impactor, and the nature of the surface of the planet they land on. Generally speaking, larger rocks leave bigger craters, smaller rocks leave smaller craters. The faster the rocks impact, the more energy is involved in the collision, and the larger the crater. Impactors that fall vertically leave the most circular craters; the greater the angle from vertical, the more elongated the resulting crater.
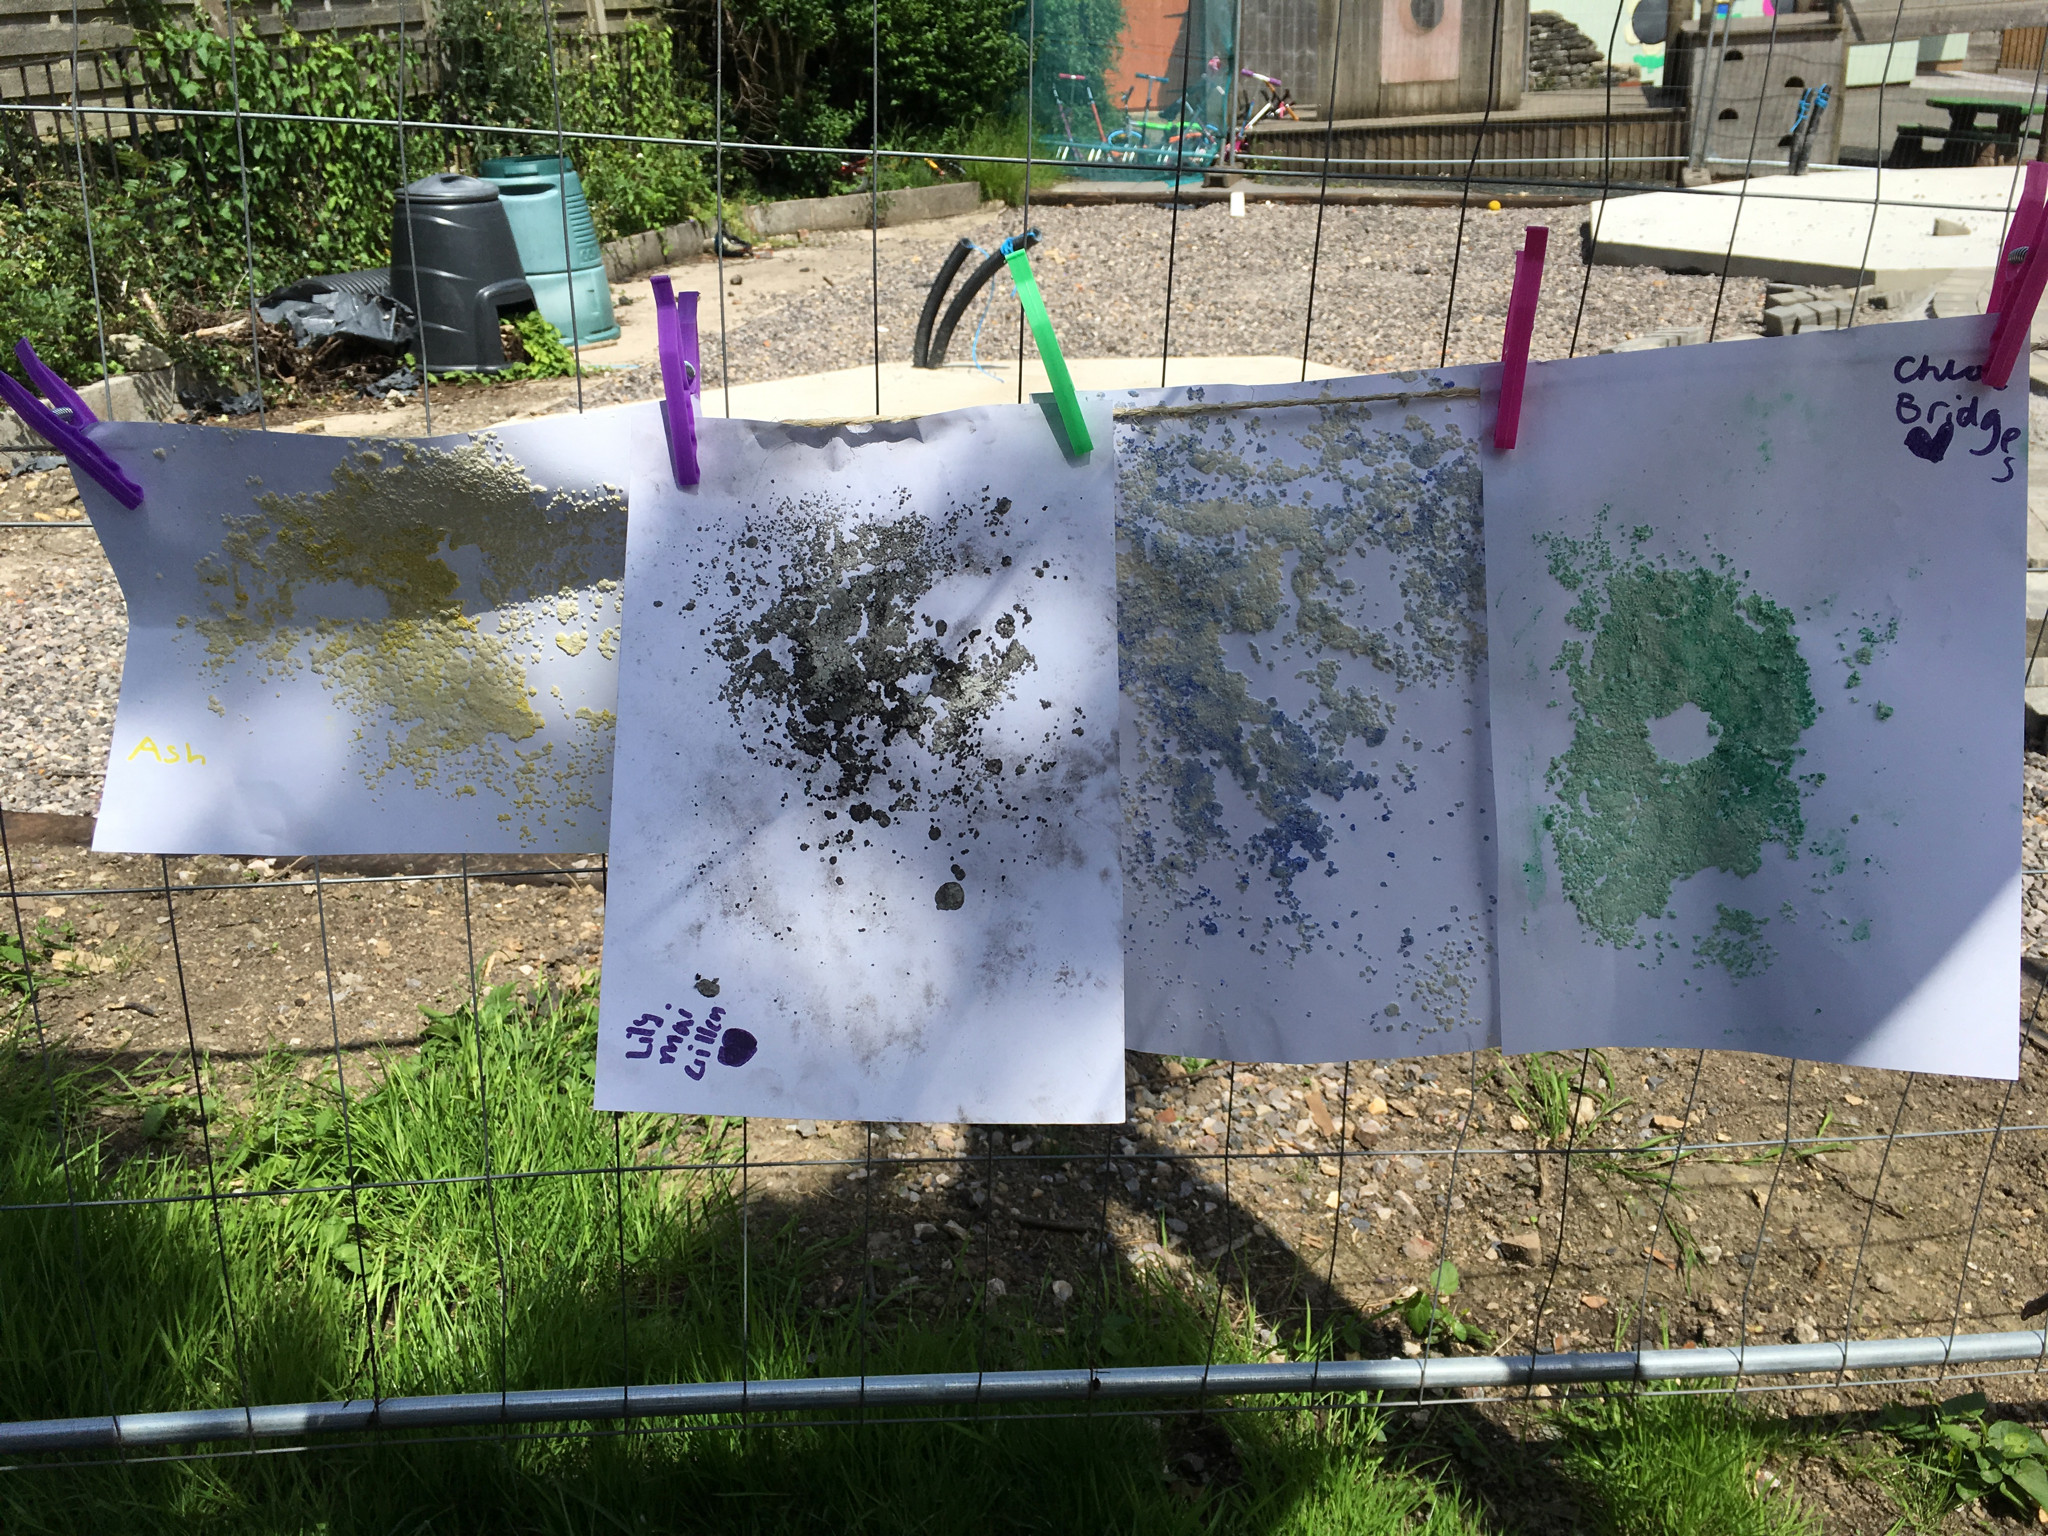
All of these effects can be replicated using the flour and marbles in this activity. Students should be encouraged to try different sizes of impactor and different angles and observe the difference in the crater left behind in the flour. Once a crater has been made and examined, dust the surface with the cocoa or powder paint, use the mister to dampen the surface, and then gently press the paper into the surface. This should leave an impression of the crater on the paper, these can be pegged up to dry, and then displayed on the classroom wall or taken home.
The activity: Students will create their own craters, investigating the sizes and shapes depending on the size of the impactor, speed, angle, etc. It is advisable to fill the trays with flour yourself in advance. One tray can be used by several students, but you may need to smooth the surface between impacts. One the students have made their images, you can laminate them to preserve them and use as part of a wall display.
Props required:
- Large picture of the Moon (see below)
- Large plastic box, tray or washing up bowl
- Plastic groundsheet or similar (if carrying out the activity indoors)
- Several bags of cheap white flour
- Cocoa or powdered paint (dark colours work best)
- A plant mister per group
- Plain white paper (one sheet per student)
- Laminator (optional)
- Small rocks of various sizes (marbles of various sizes can also be used)
Safety note: be careful with dust if there will be anyone with breathing difficulties present during the activity as flour inhalation can aggravate lung problems such as asthma.
- Put the plastic groundsheet on the floor and smooth it out.
- Put the plastic tray in the centre of the plastic sheet.
- Carefully fill the tray with flour – it only needs to be about half full. This flour is like the surface of the Moon. Do not press down the flour, leave it loose.
- Choose your asteroid! You need a marble or small rock, this will create your crater in the flour.
- Stand a few steps away from the tray of flour and gently throw your asteroid into the tray. You will see a hole appear in the flour, made by your asteroid – this is your crater!
- Look carefully at your crater: what shape is it? Is it a circle, or is it oval?
- To make a picture of your crater, carefully dust the top of the flour with the cocoa or powdered paint. Then use the plant mister to spray some water onto the flour.
- Take a sheet of white paper and gently press it on to the surface of the flour. If you press too hard you will destroy the crater, so only press very softly.
- Carefully lift away your sheet of paper, you should see an image of the shape of your crater on the paper.
- Write your name on the paper and put it somewhere warm to let it dry.
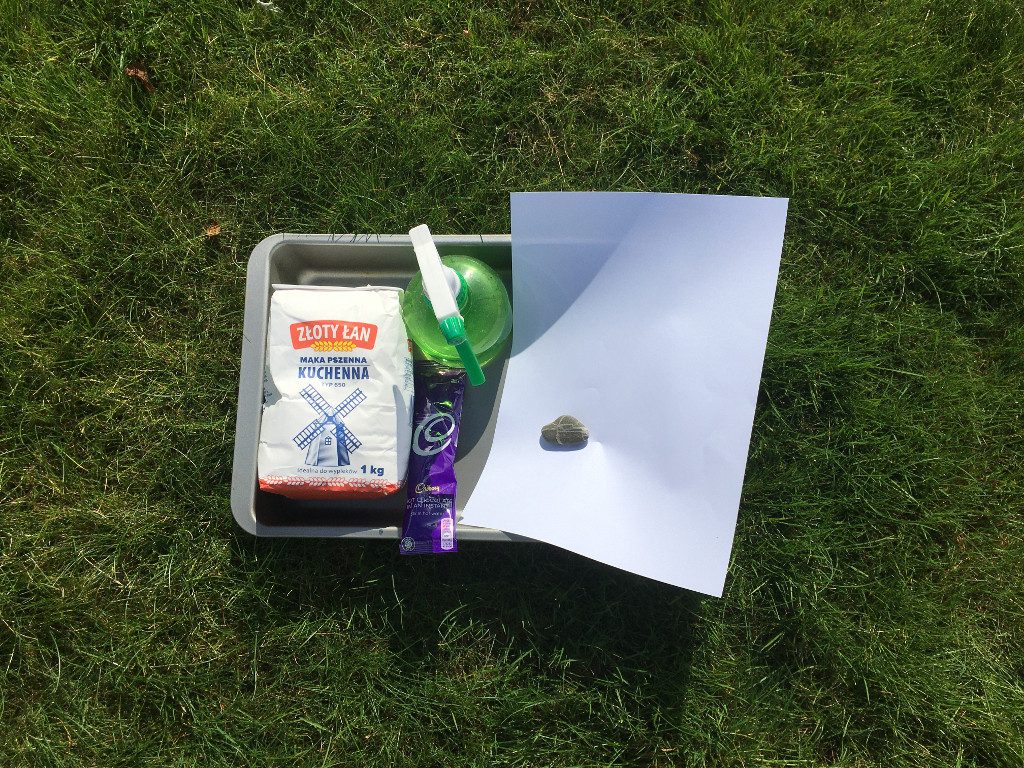
Step 0: the materials needed (not including a groundsheet) 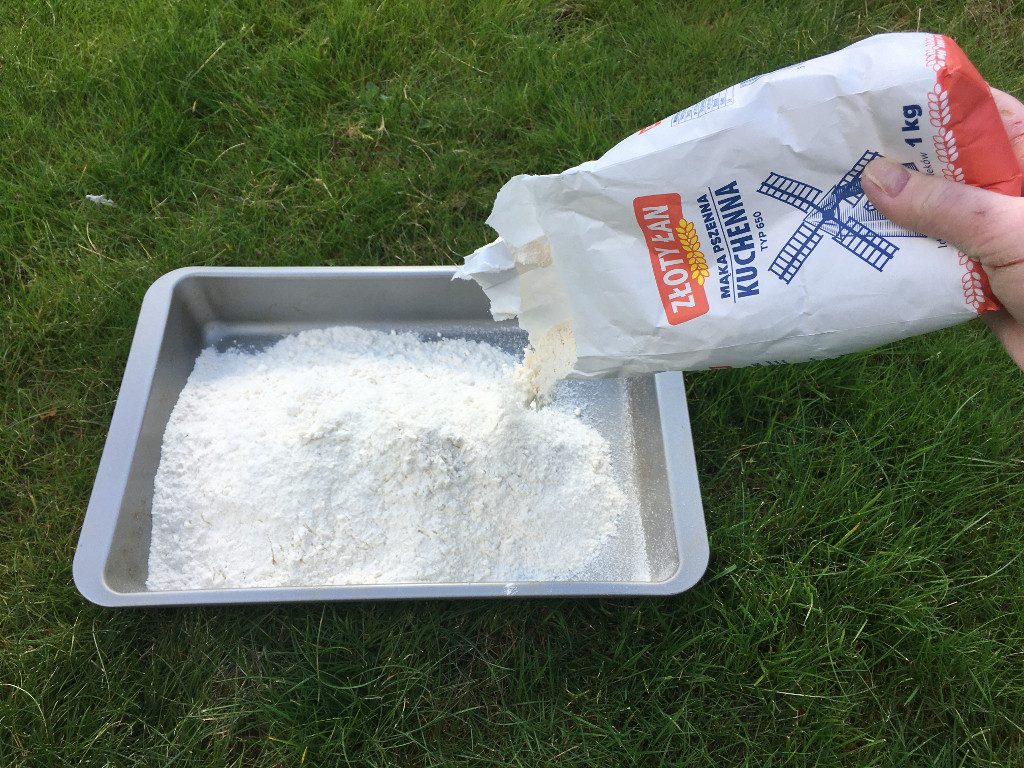
Step 3: empty a bag of flour into the tray 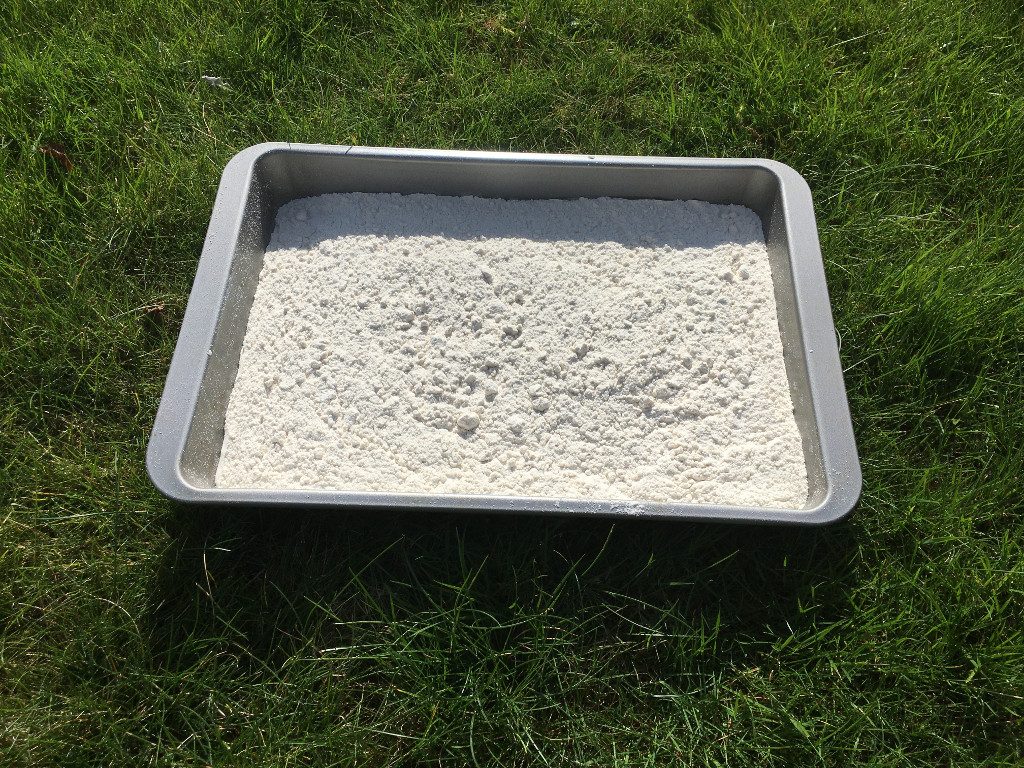
Step 3: empty a bag of flour into the tray – leave it loose! 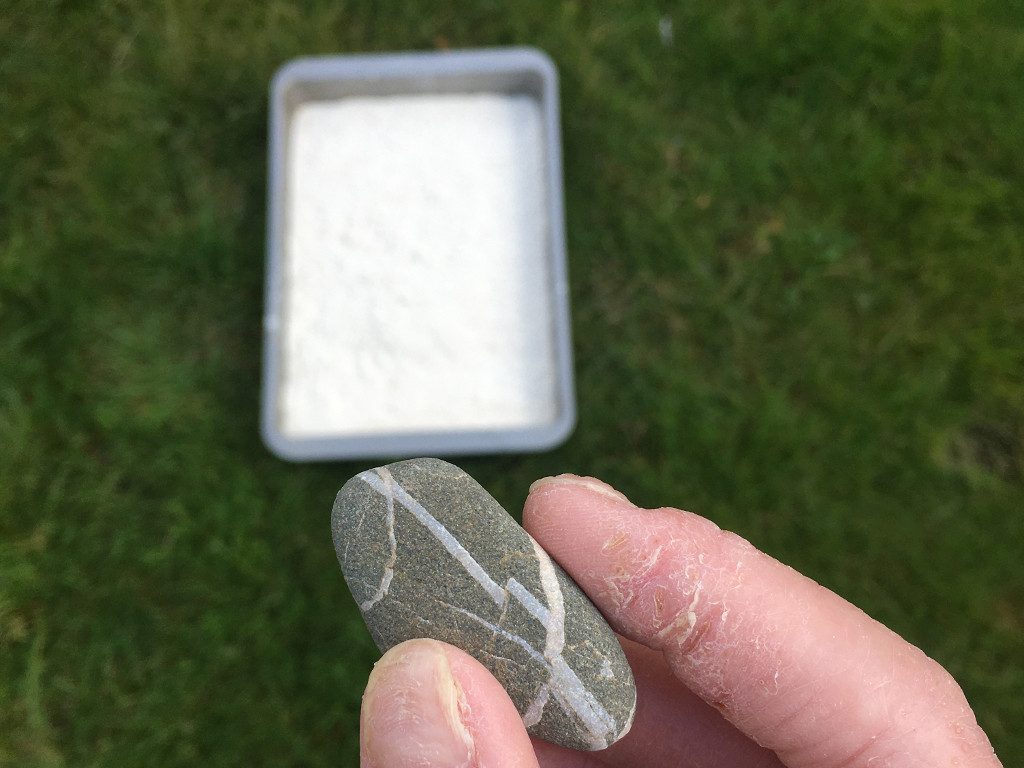
Step 4: choose your asteroid 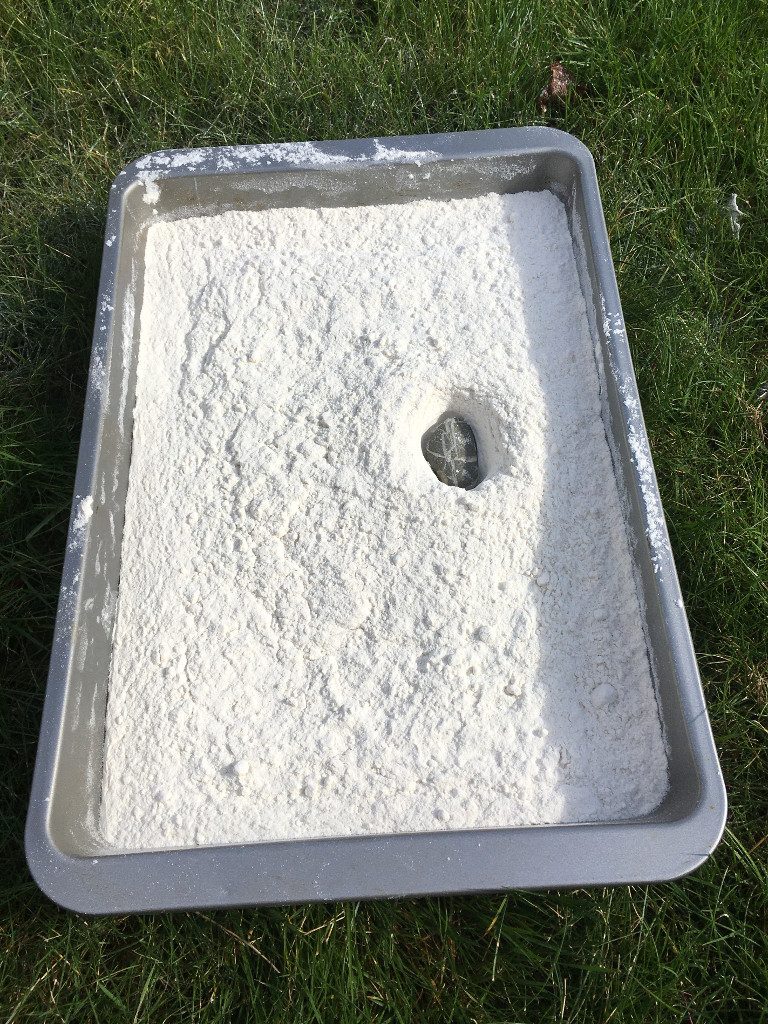
Step 5: throw your asteroid into the flour to make a crater 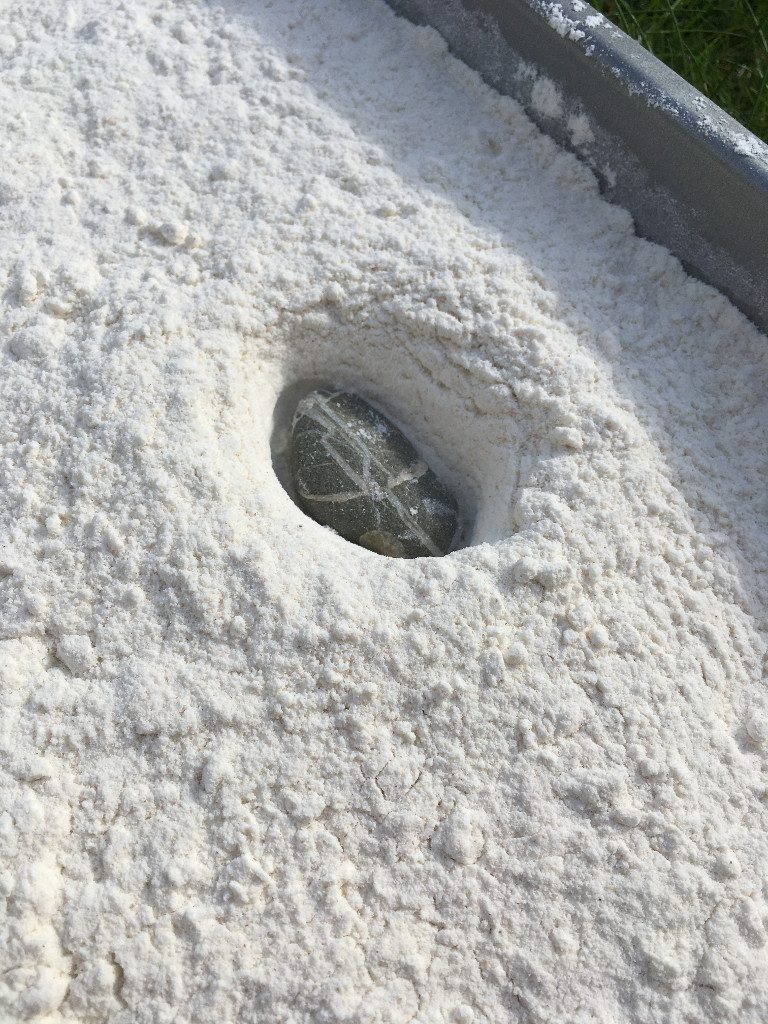
Step 6: look carefully at your crater 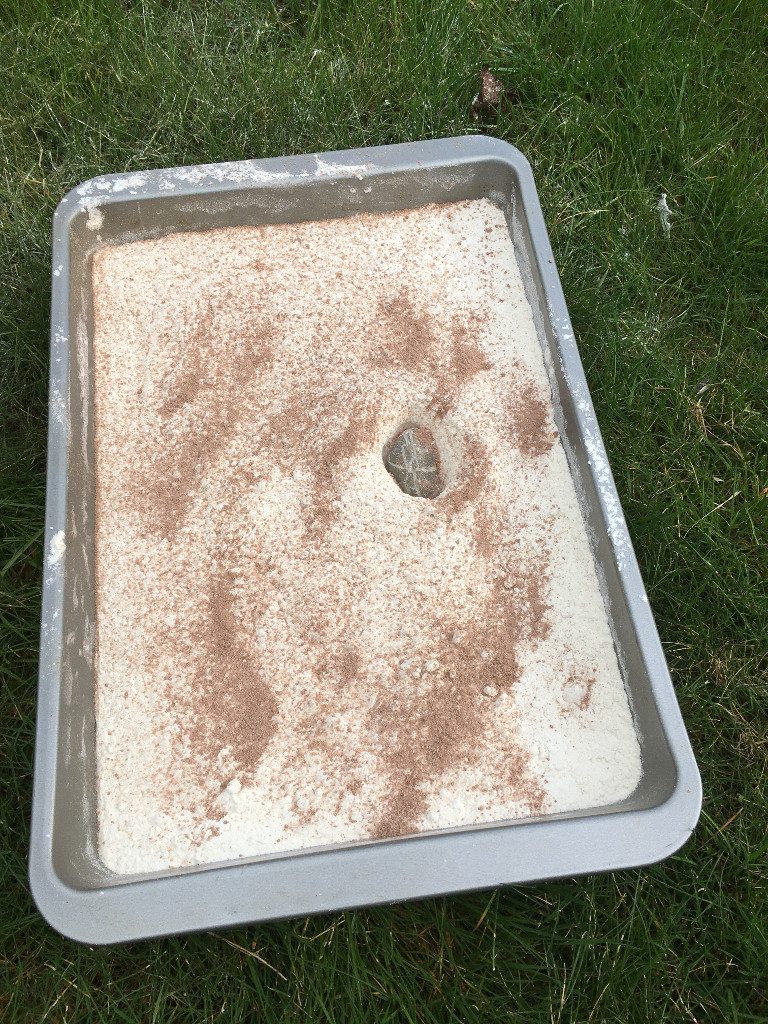
Step 7: dust the top of the flour with some cocoa powder 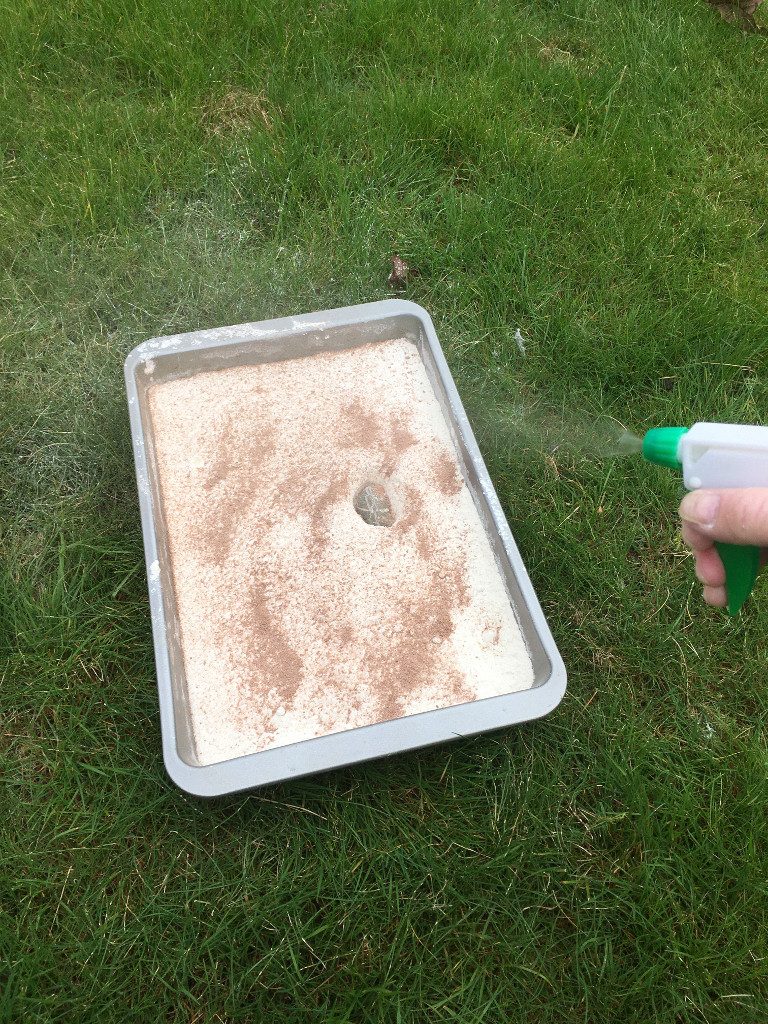
Step 7: spray some water over the top 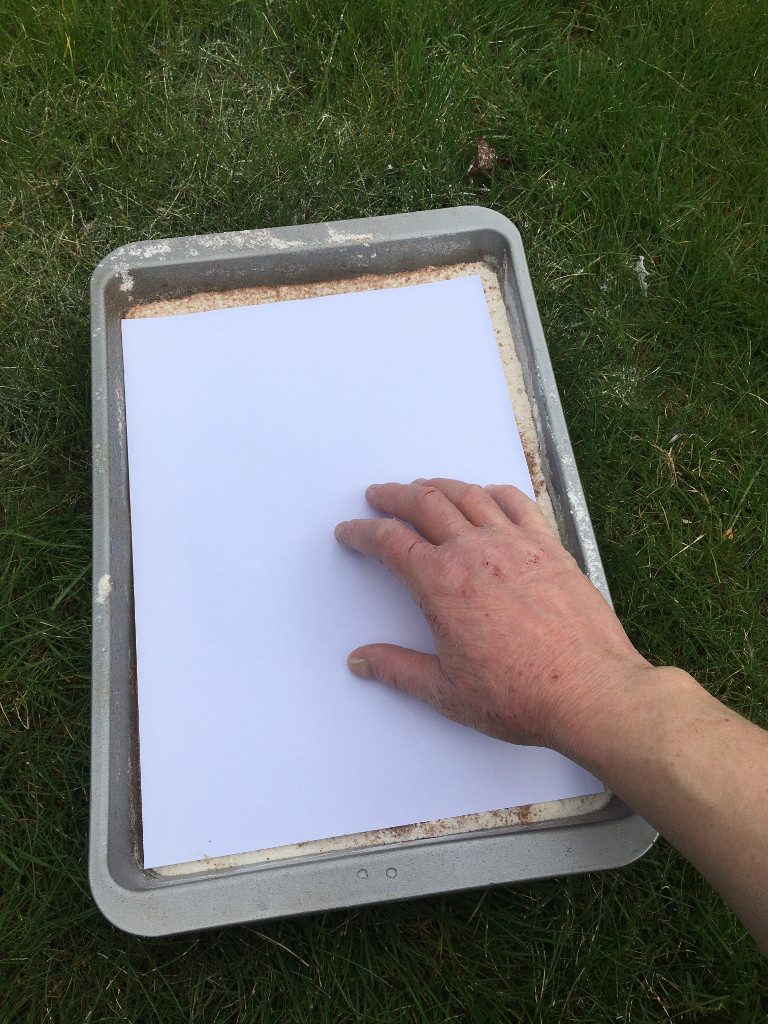
Step 8: gently press a sheet of paper onto the flour to make an impression of your crater 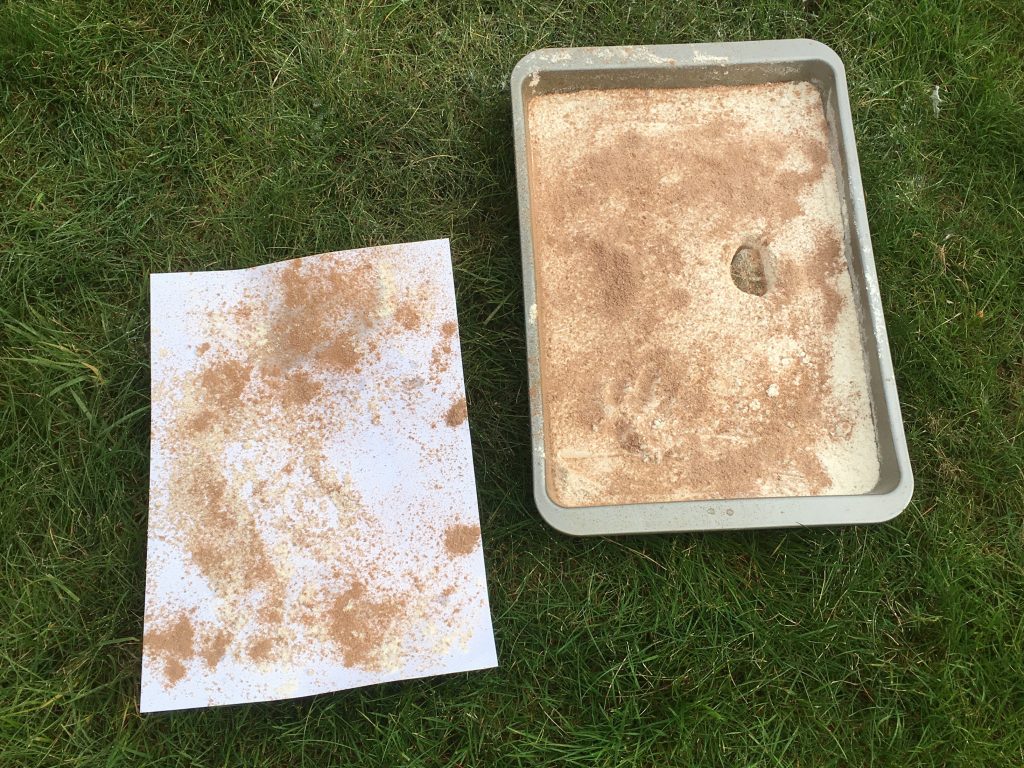
Step 9: carefully lift away the paper and admire your crater!
Extension: this activity can be done in a very scientific way. The students can be encouraged to think what might happen in the experiment before trying it, and they could be guided in designing their own experimental procedure to test the effect of one variable by keeping the others the same, for example they could:
- test the effect of velocity by using the same size projectile at different speeds,
- test the effect of angle on crater shape using the same projectile and speed, or
- test the effect of projectile size when keeping the velocity and angle constant.
Common misconceptions:
- The Moon is made of cheese – although a tasty thought, the Moon has a solid surface and is made of rocks, just like the surface of the Earth.
- The dark areas on the Moon’s surface are lakes or seas – the dark patches were thought to be water until good telescopes were developed. Now we know that the dark areas are actually the result of molten rock filling in giant impact craters that were created when large rocks hit the Moon’s surface several billion years ago.
Use with other years:
- This can be used for EYFS Understanding the World and what we see on the Moon. Emphasis here could be on describing what they see, rather than making images.
- A related activity on our site is Moon Globes.
SEND notes: tactile Moon maps can be used for visually-impaired students so that they can get a view of the kind of terrain on the surface of the Moon and the features that make up the images in the stories. One example tactile Moon globe is available as a 3D printer file from the Universidad de Valencia.
Linked activities for Y3 Rocks:
STFC’s Borrow the Moon – samples of real space rock which can be borrowed and used in school (very popular so book well in advance).
https://stfc.ukri.org/public-engagement/activities-for-schools/borrow-the-moon/apply/
A similar activity from astroEDU
https://astroedu.iau.org/en/activities/1311/lunar-landscape/
Tactile Moon globe – file for a 3D printer to create your own tactile Moon model
https://planetarymapping.wordpress.com/2016/05/02/tactile-globe-of-the-moon/
Linked activities for EYFS:
What do you see in the Moon
https://www.lpi.usra.edu/education/space_days/activities/moon/documents/Moon_What_Do_You_See.pdf
For more Moon tales – we have many Moon tales on our site but here are some more that explain what different cultures “see” on the Moon
https://www.lpi.usra.edu/education/explore/marvelMoon/tales/
Other resources:
A set of images showing different types of craters on the Moon: https://www.lpi.usra.edu/education/explore/LRO/activities/craterCreations/Lunar_Crater_Images.pdf
Copyright: Megan Argo 2019